Pushing Paper II

I’m generally quite a logical person, but I’m not always methodological. Often I’ll have an idea that I want to try out, and instead of following the steps which logically come before it, I launch straight in. Maybe I’m just not that interested in the preceding steps, or maybe I’m just impatient.

Anyway, armed with some Micron fine liners I decided that rather than start again where I left off last time, I would change a few things all at once. Sometimes in my art class we will do an exercise where we draw something and then pass our work onto the next person who then adds to or modifies it. I’m not keen on this exercise, in relinquishing control to someone else, of letting someone else be a part of my work.

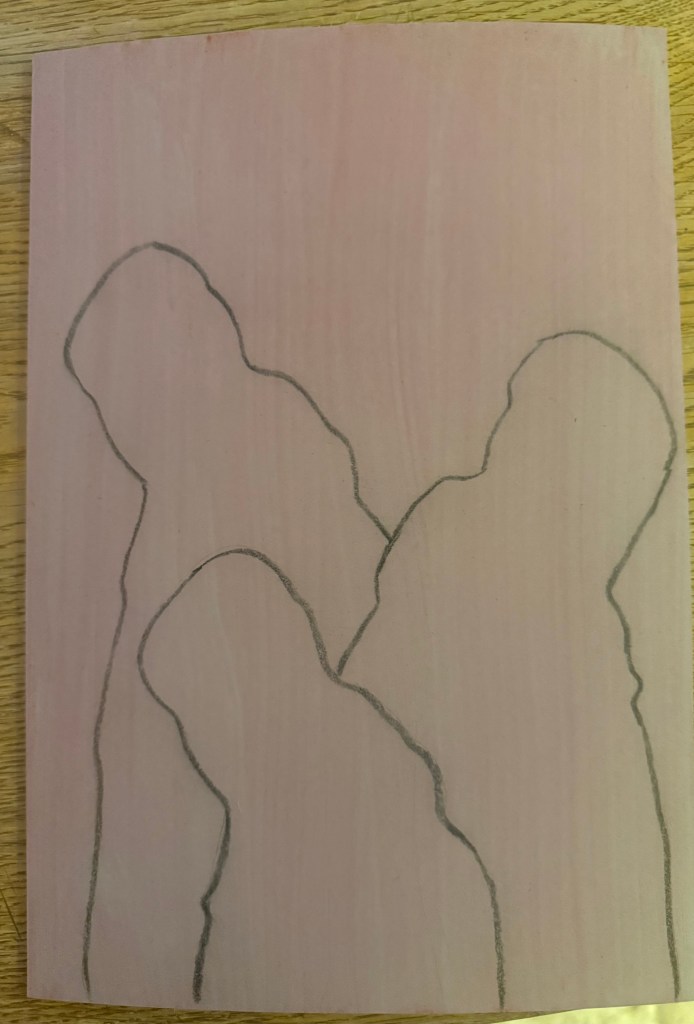
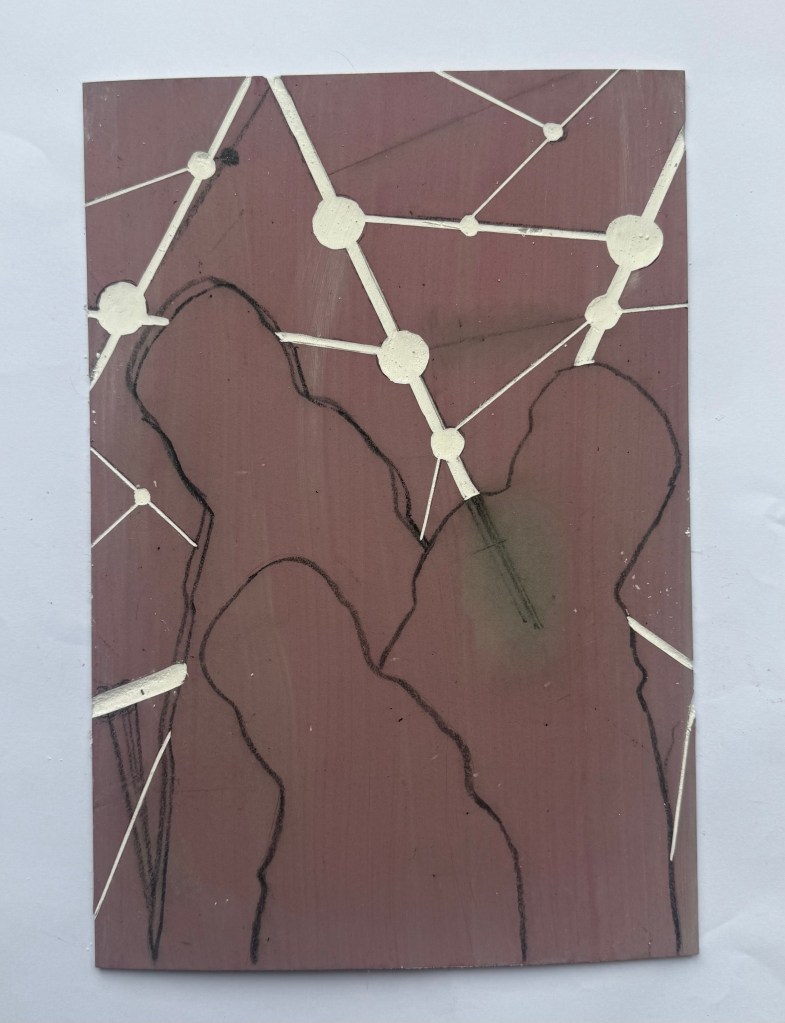
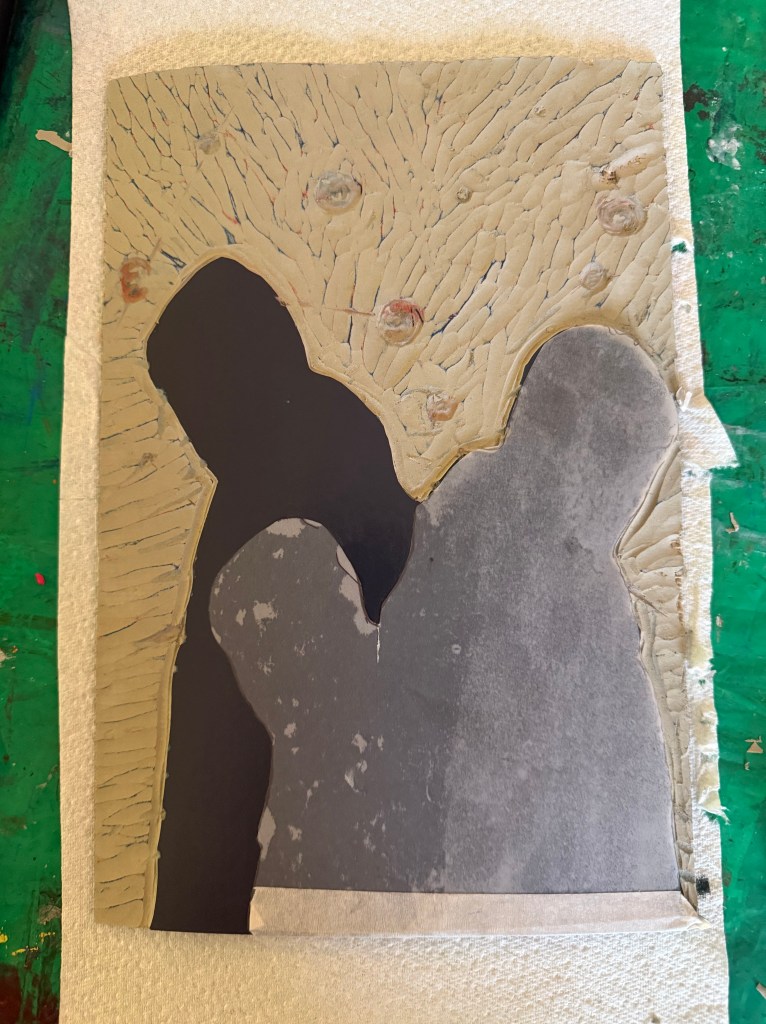
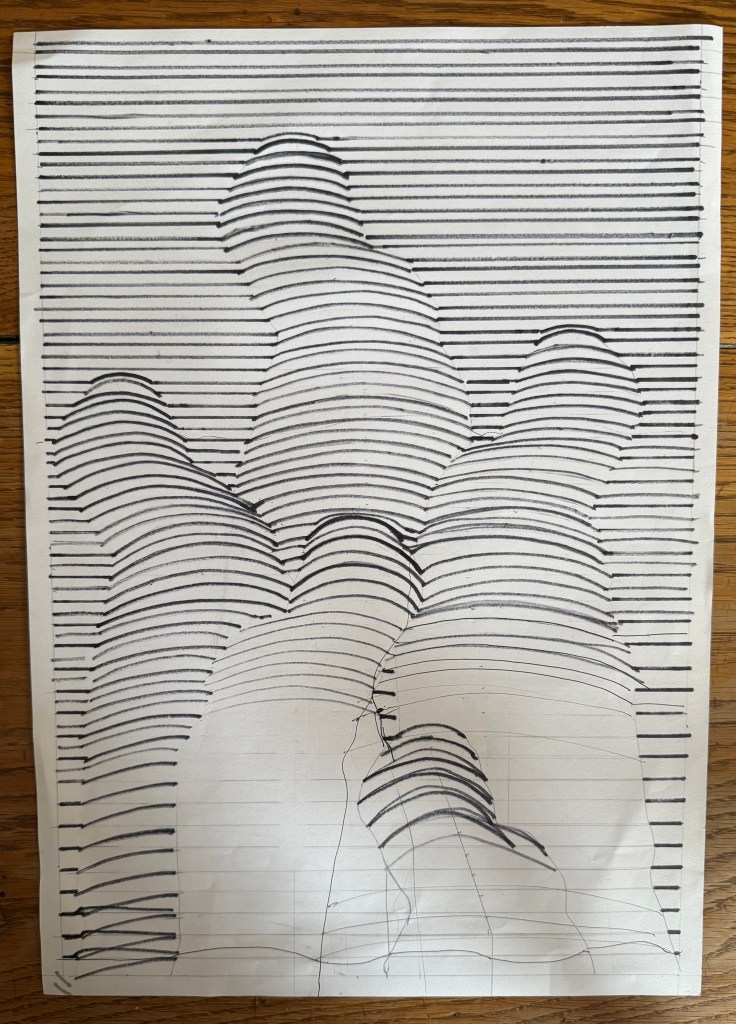
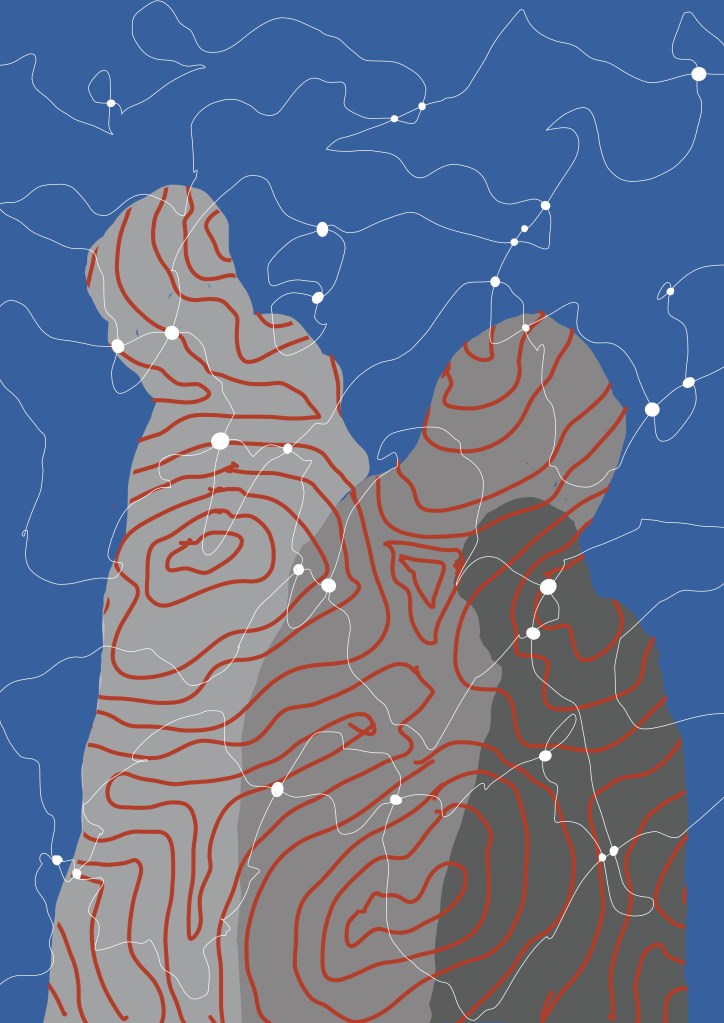
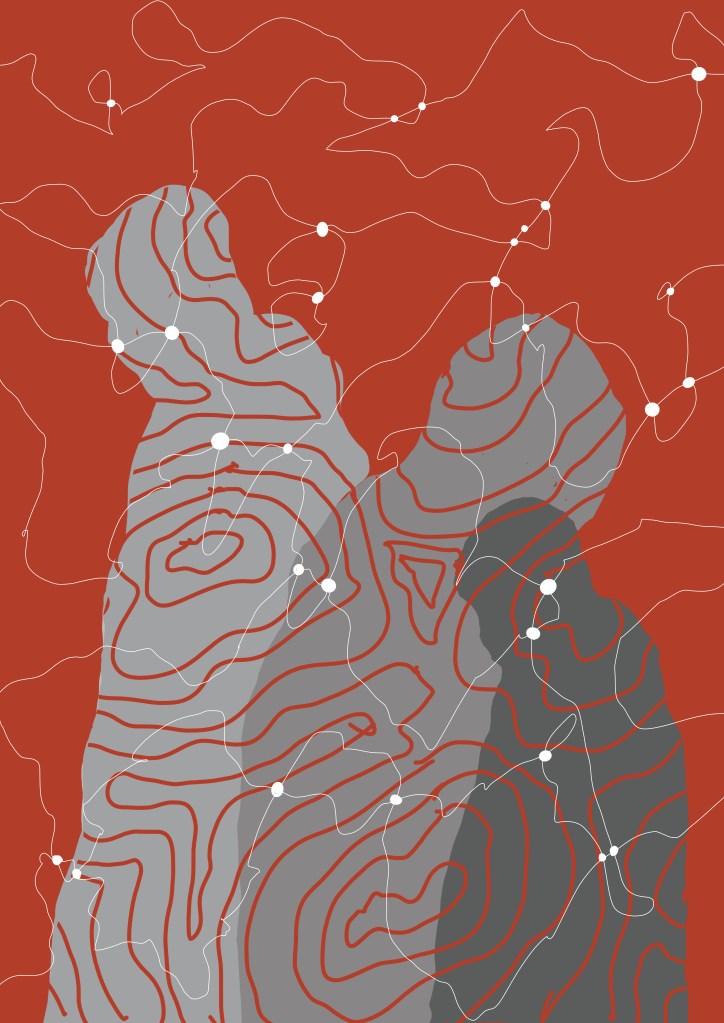
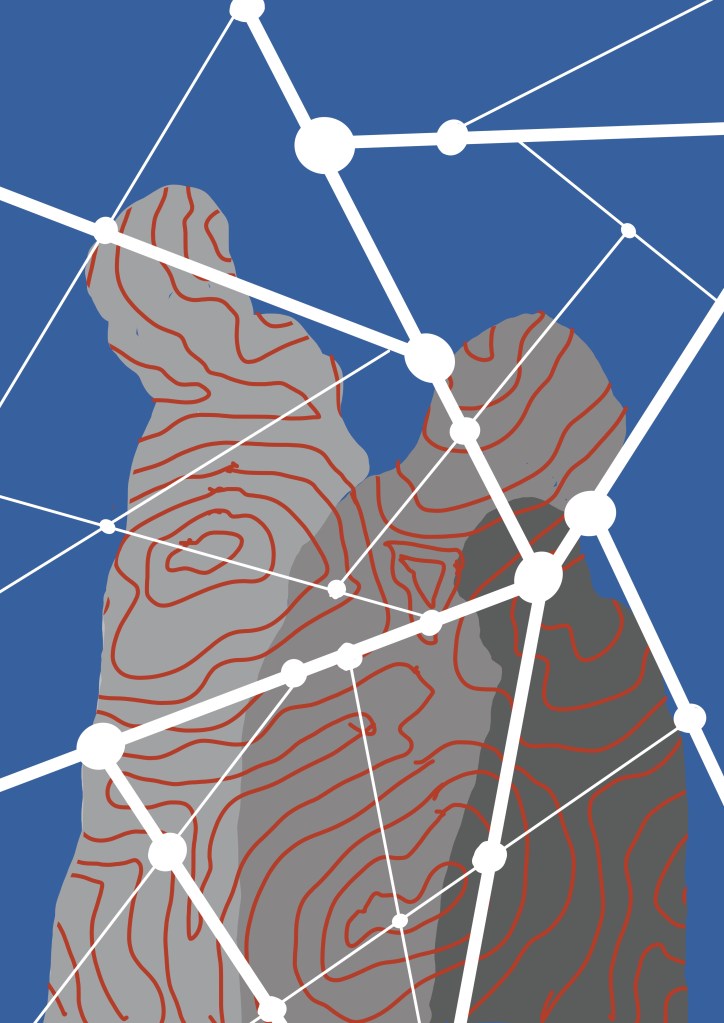
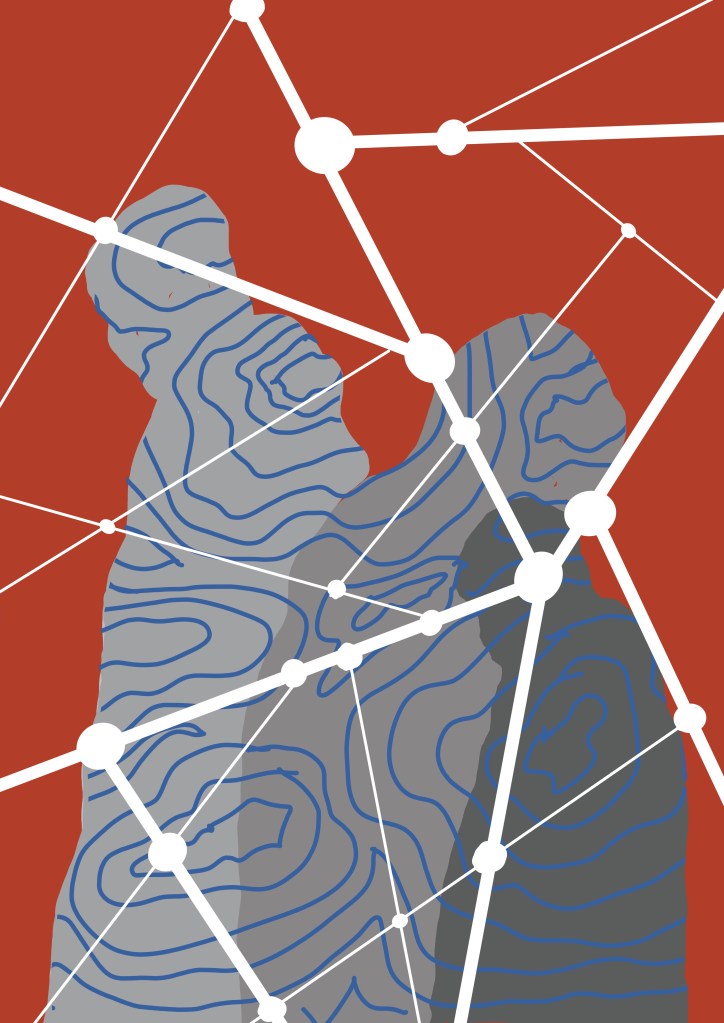
As drawing lines is a repetitive, controlled and focussed act, I decided that I wanted to shake it up a bit, to introduce an element of unpredictability. Whilst drawing a random outline is to all intents and purposes unpredictable, because I’ve done it so many times I suspected that I might have developed an unconscious pattern of movement, a comfortable way of doing it. So, I decided to ask my husband and daughter each to draw an outline to which I would then respond with a simple system of using the same width of pen and filling in each section with lines, ensuring the lines in adjacent sections are going in different directions. I also allowed myself the opportunity of leaving a few sections blank or treating them in a different way. I worked on A2 off white cartridge paper.
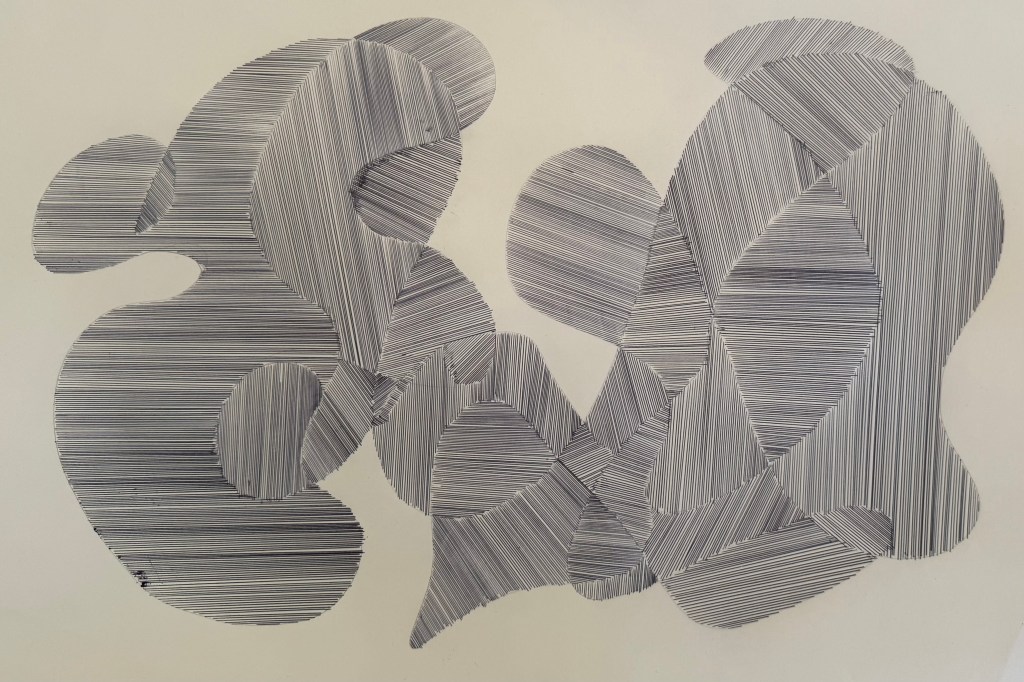
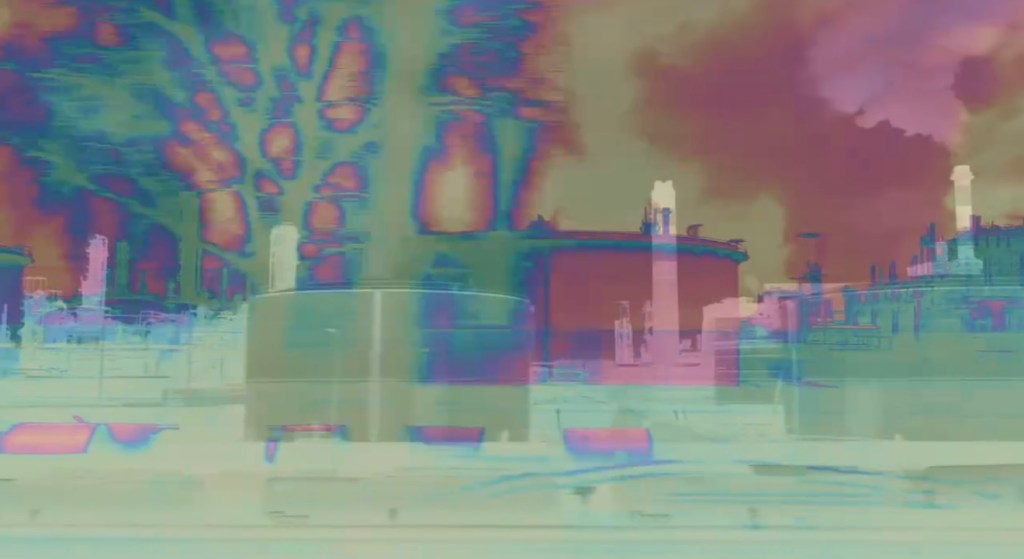
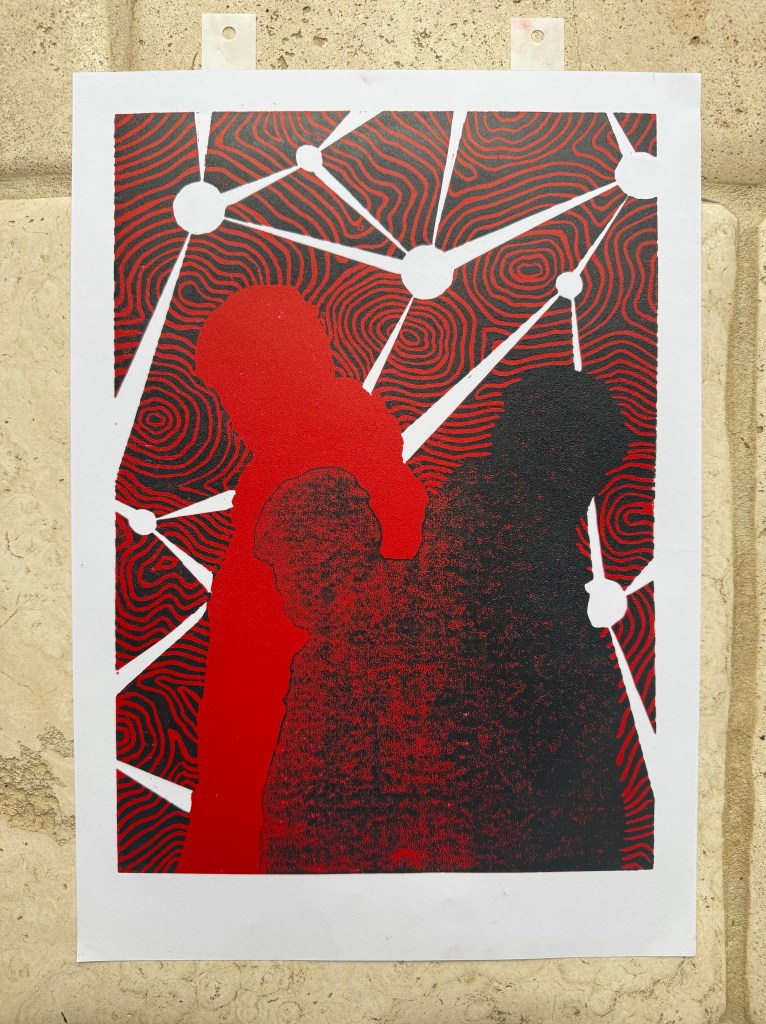
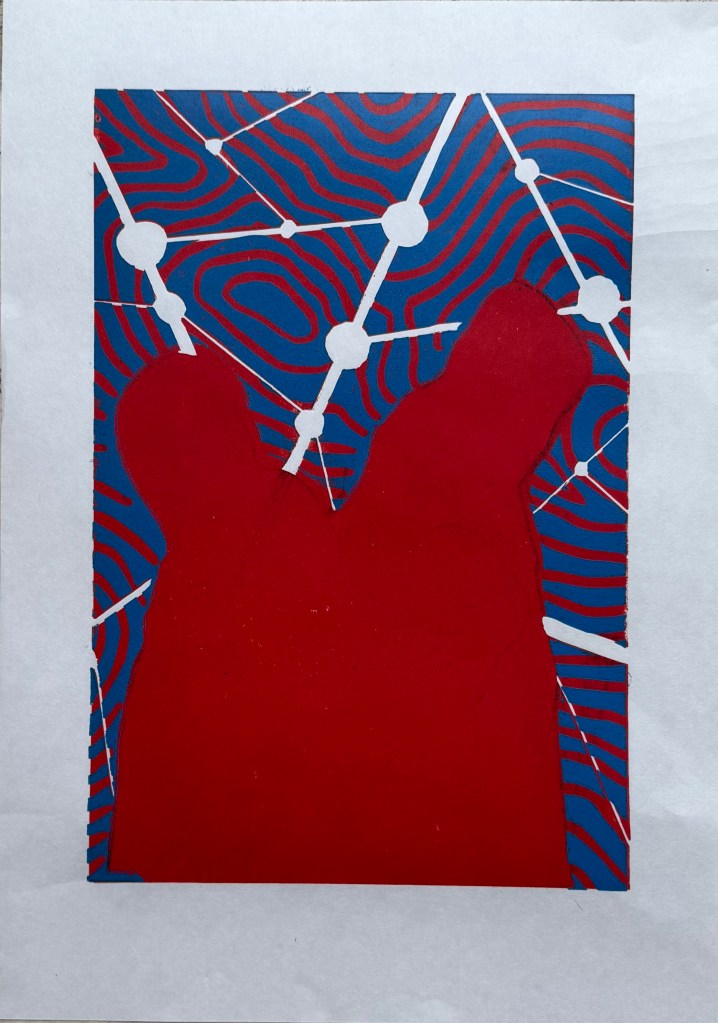
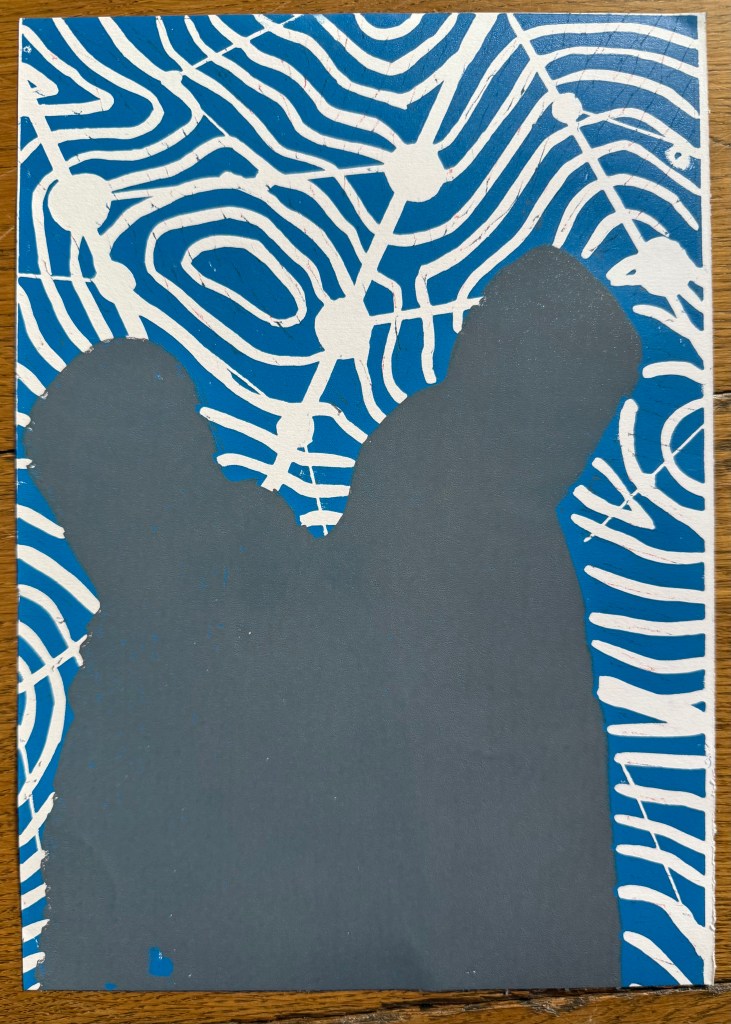
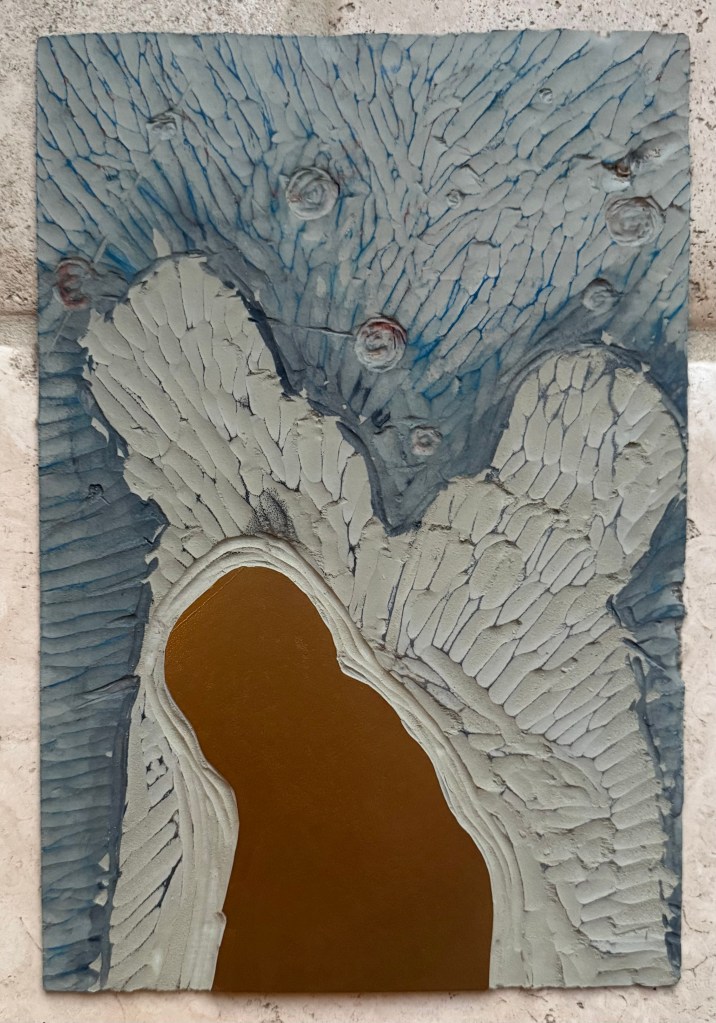
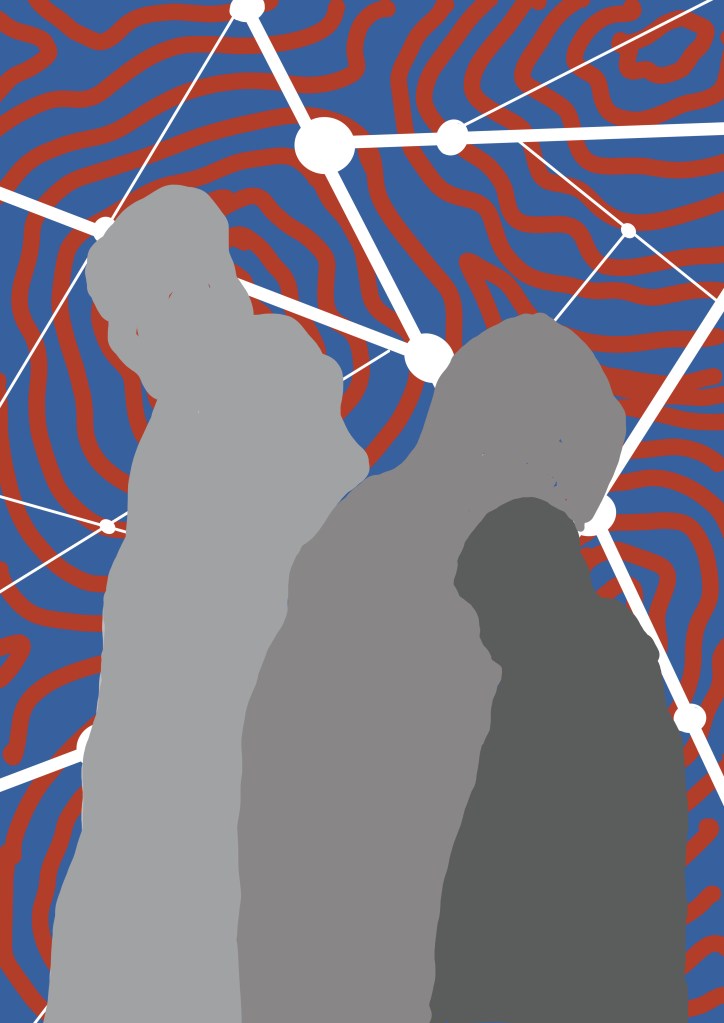
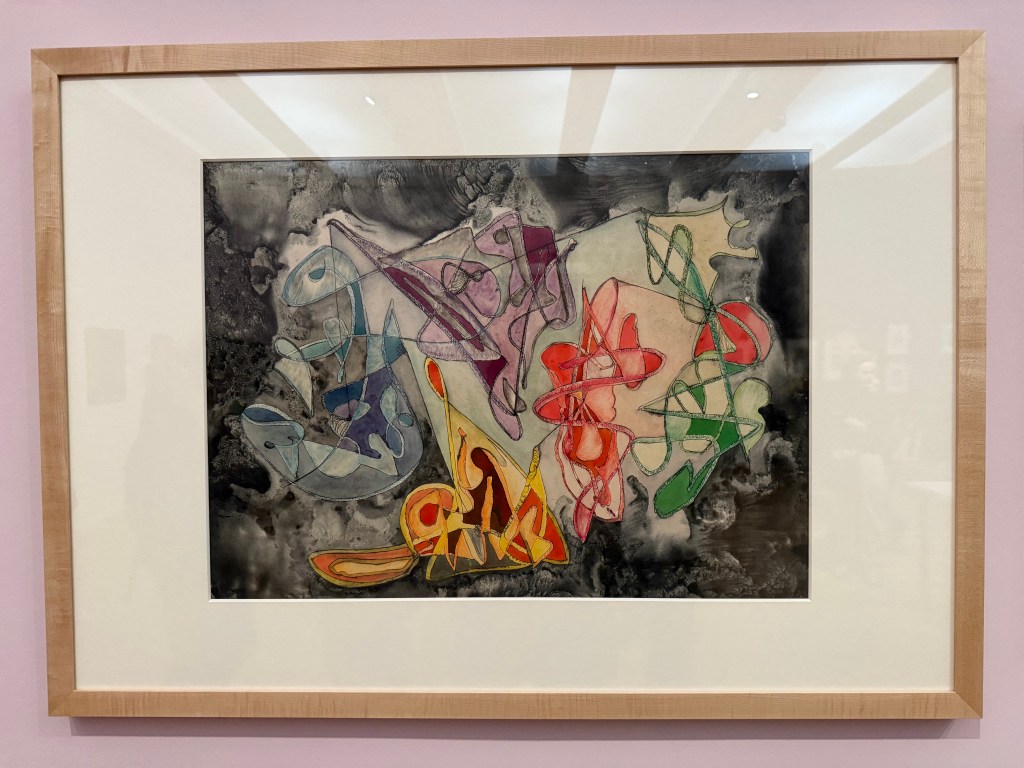
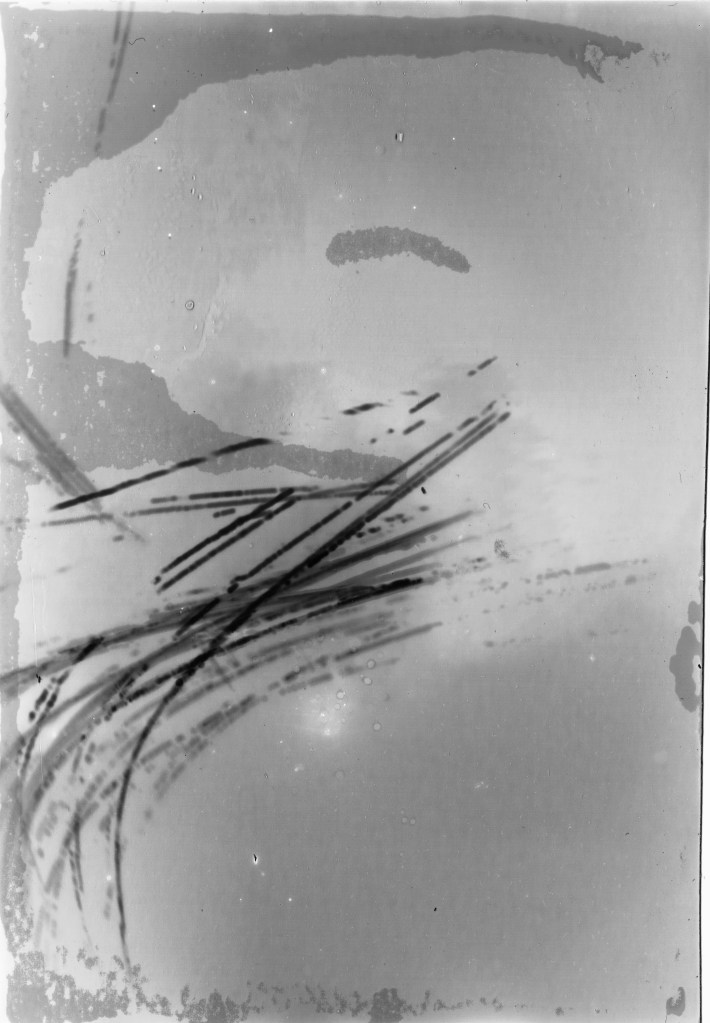
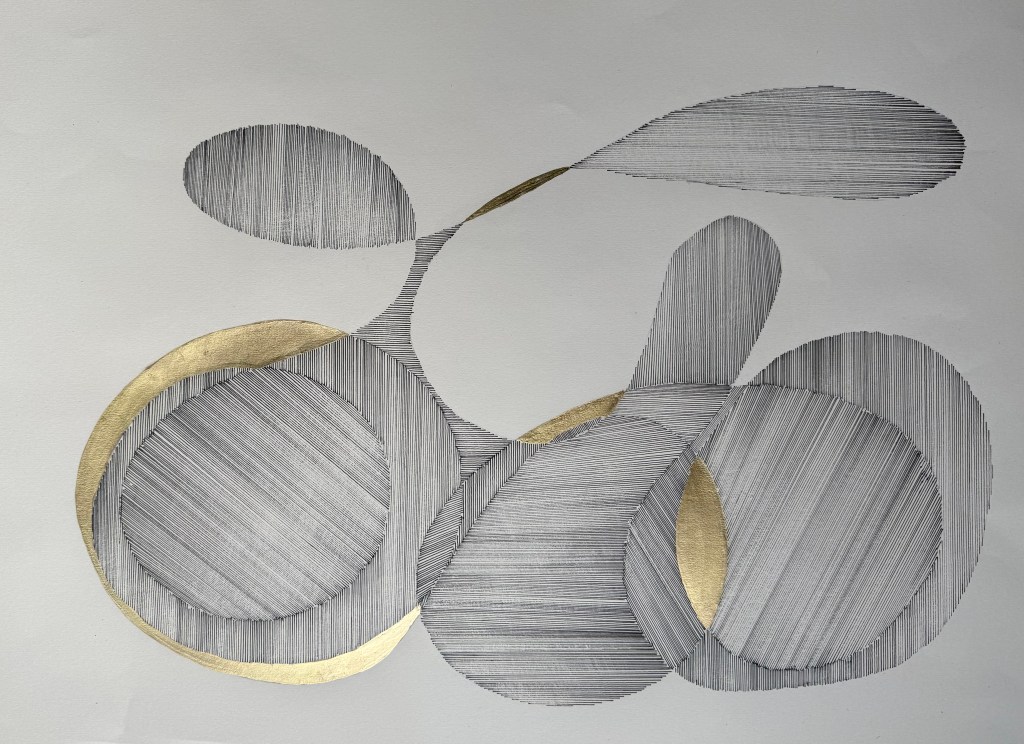
My husband’s:

This is the orientation it was drawn in and I prefer it this way as it gives it a feeling of instability, discord, of something melting. Anyway, the other way up it reads as a cyclist with a flat rear tyre.
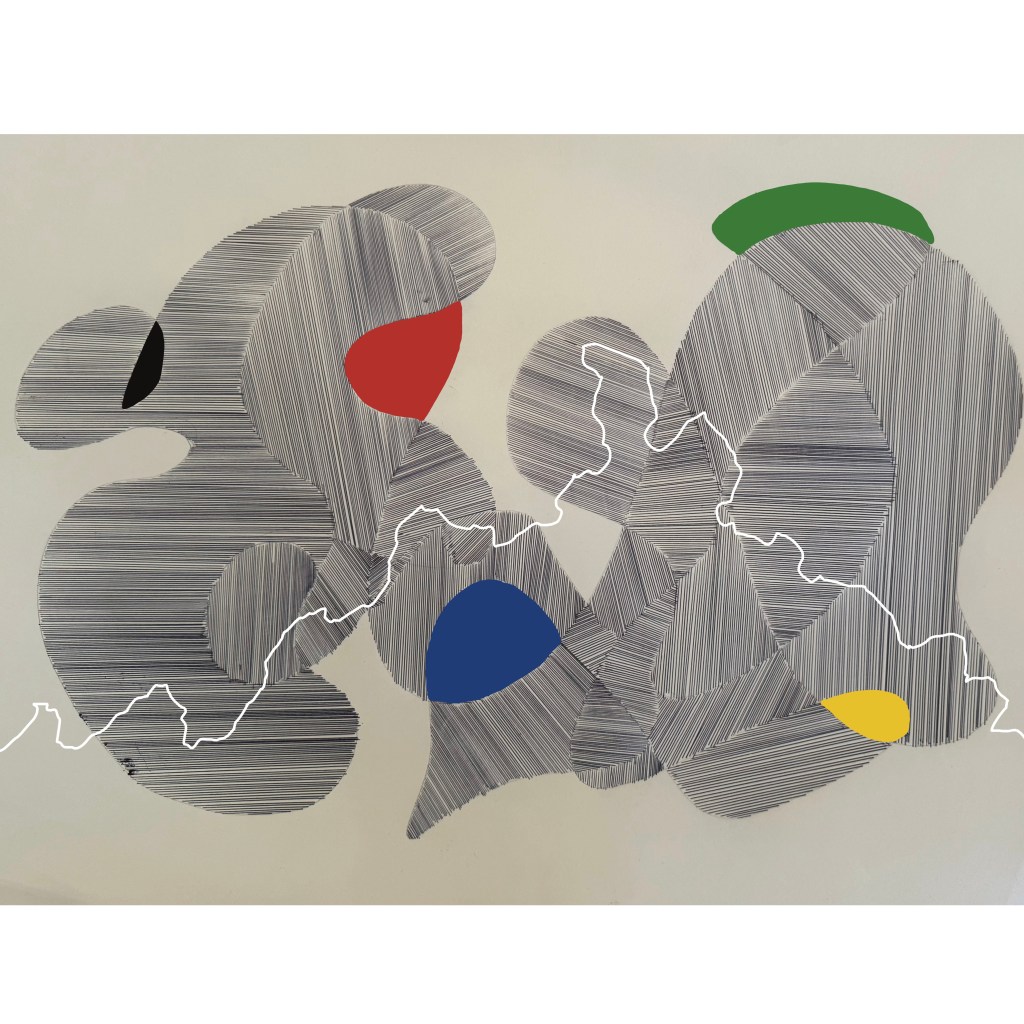
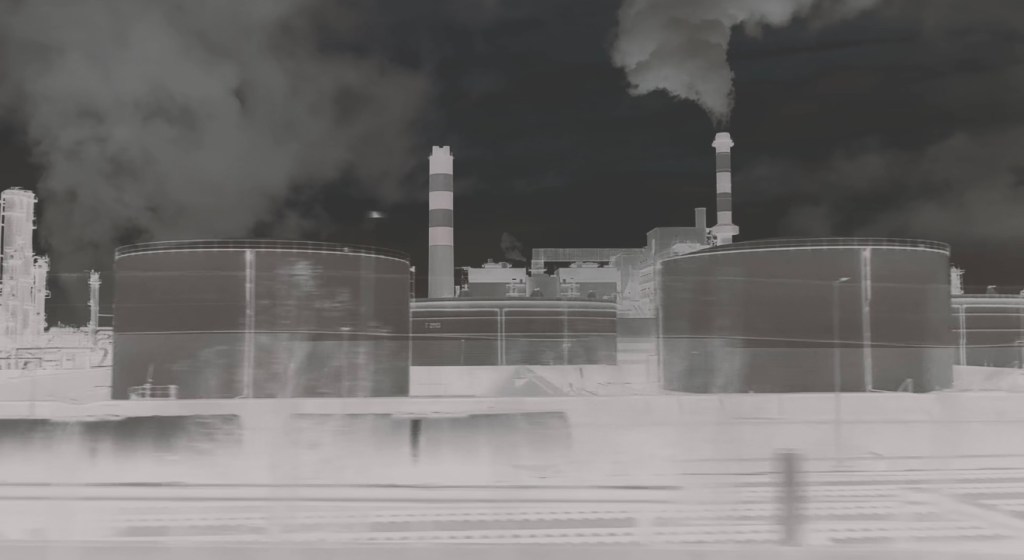
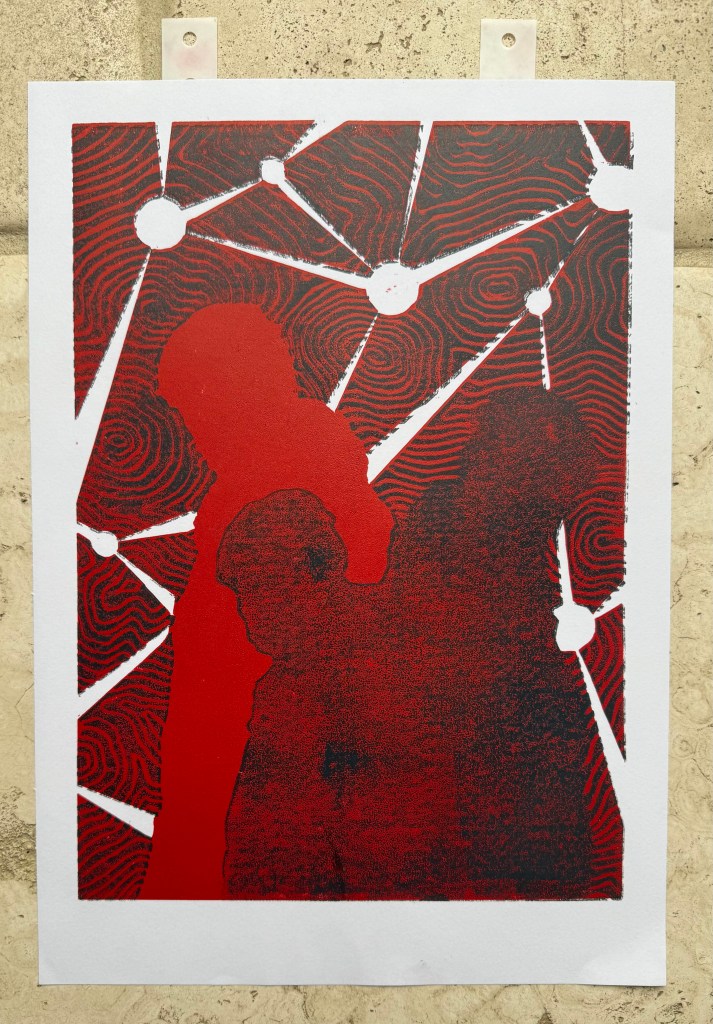
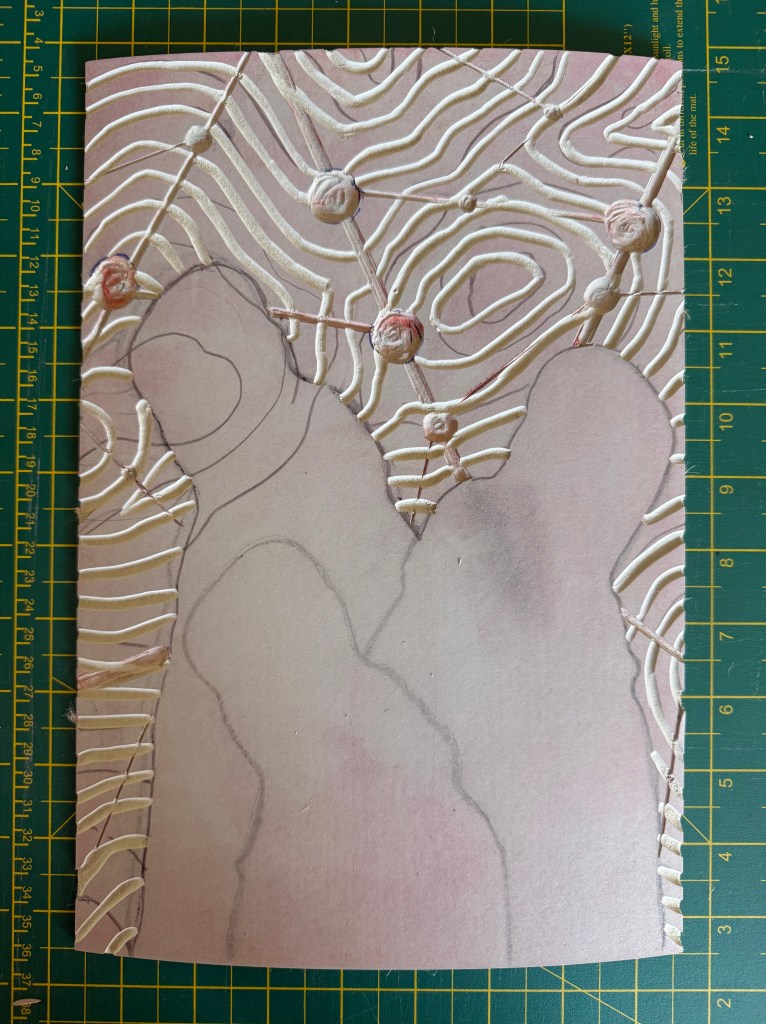
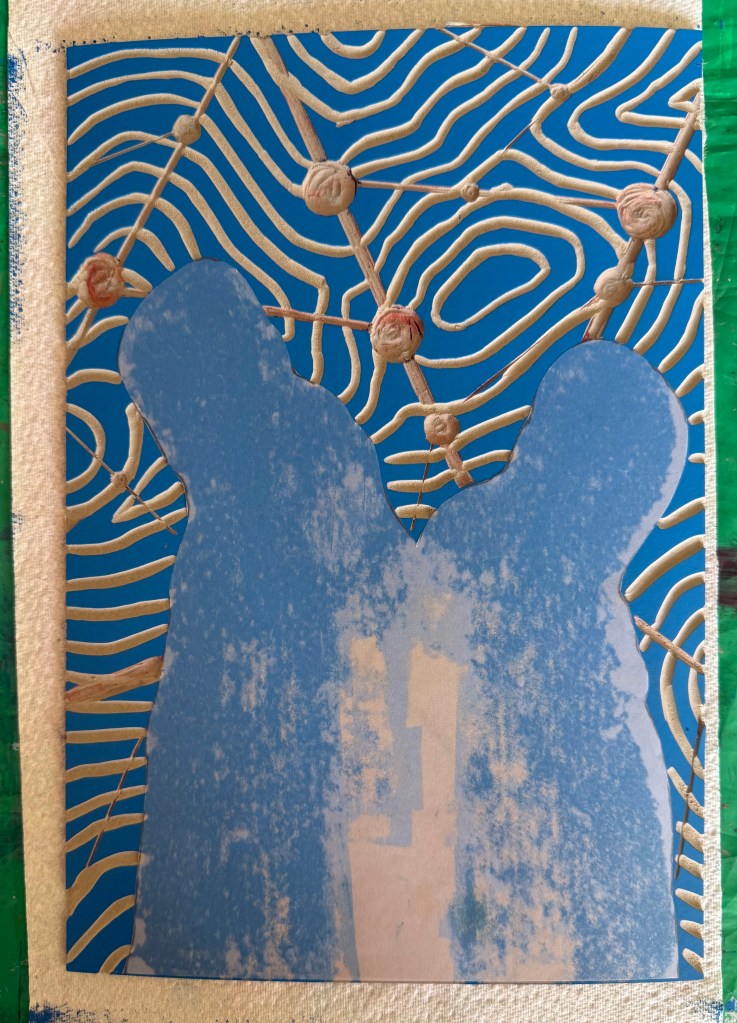
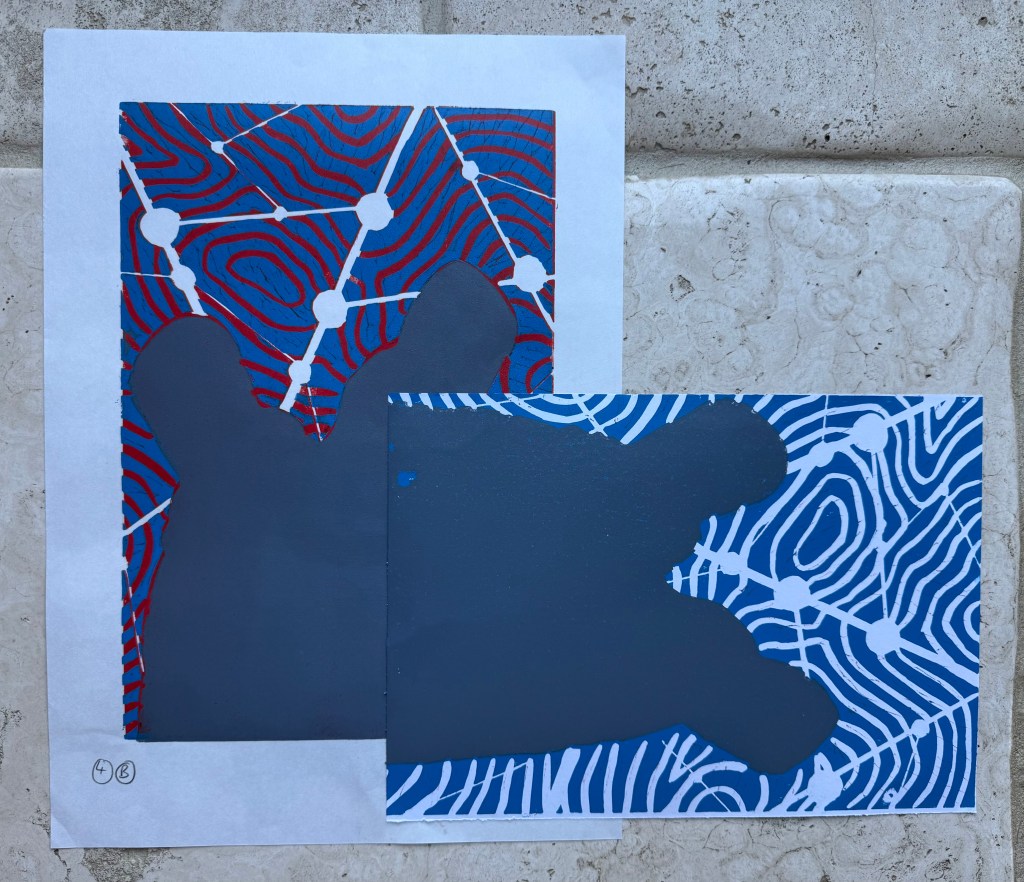
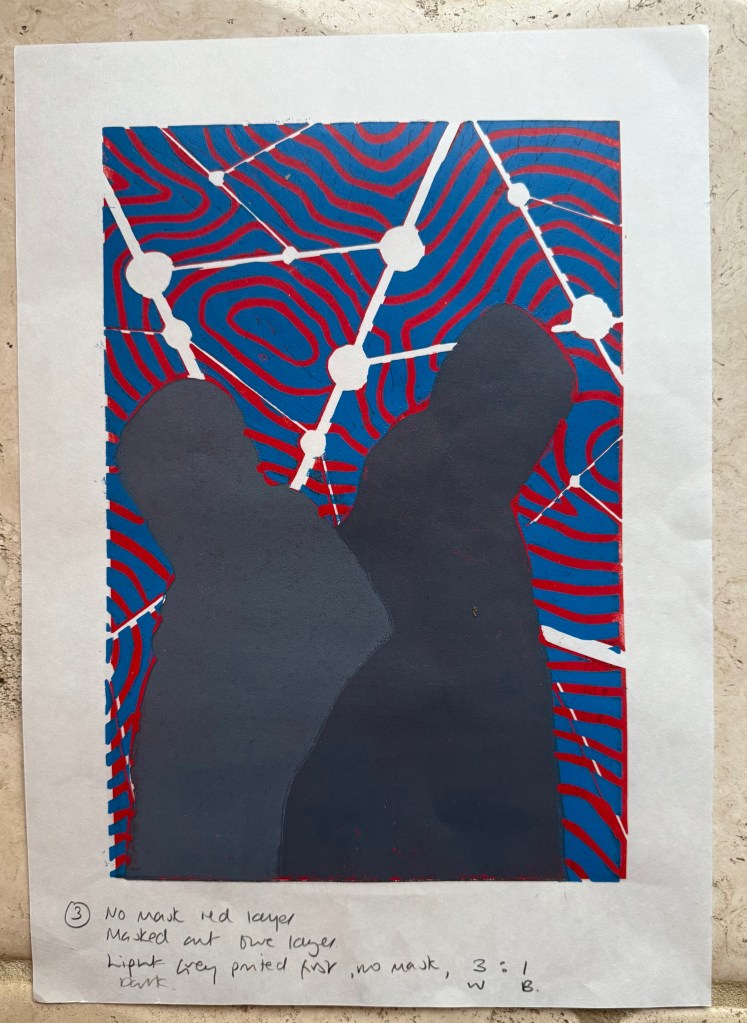
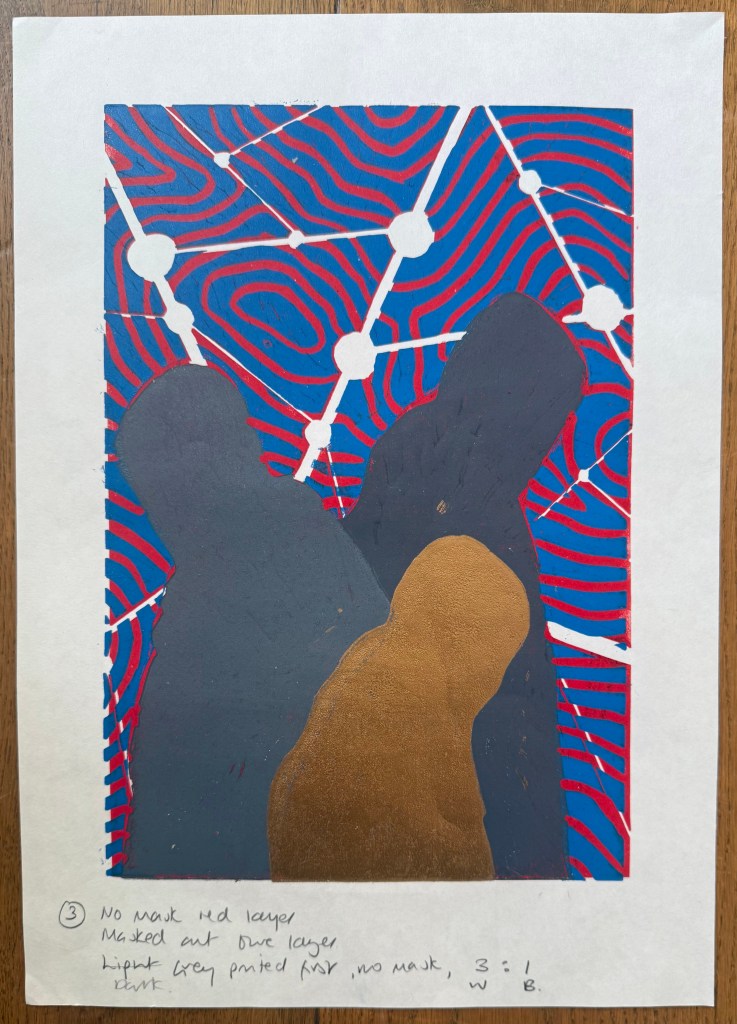
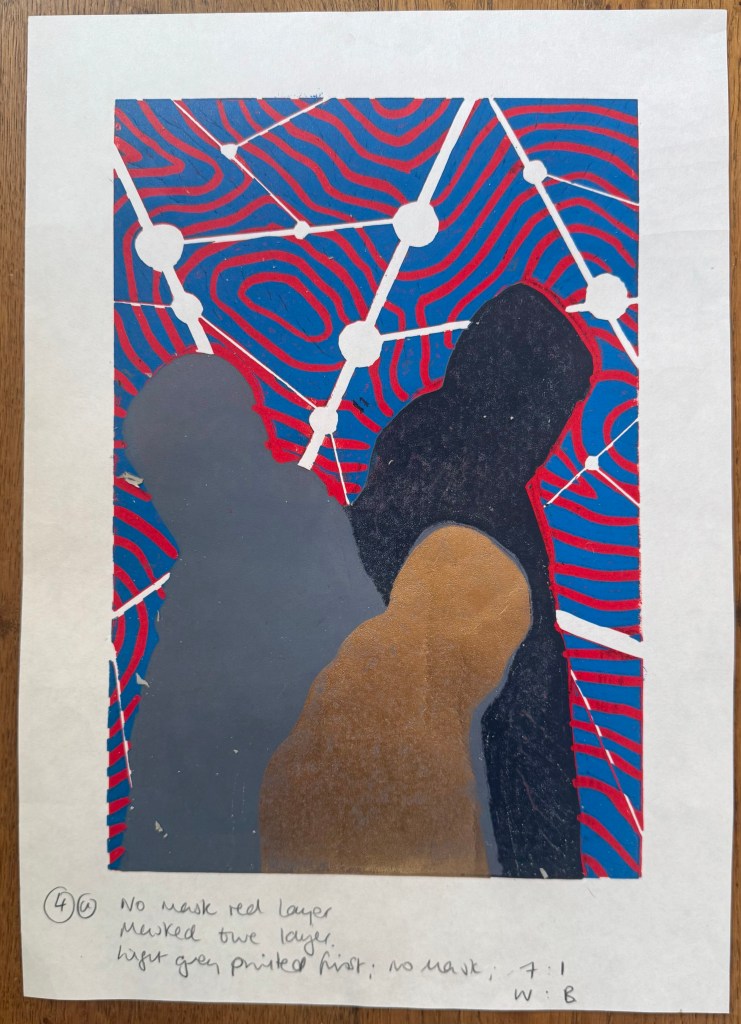
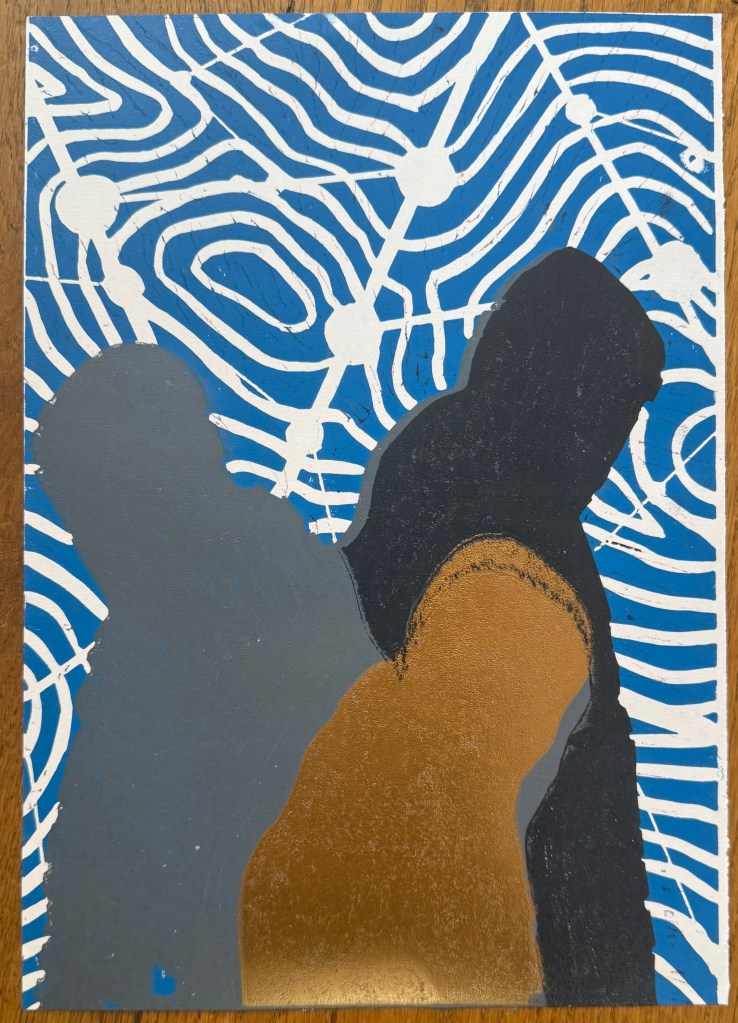
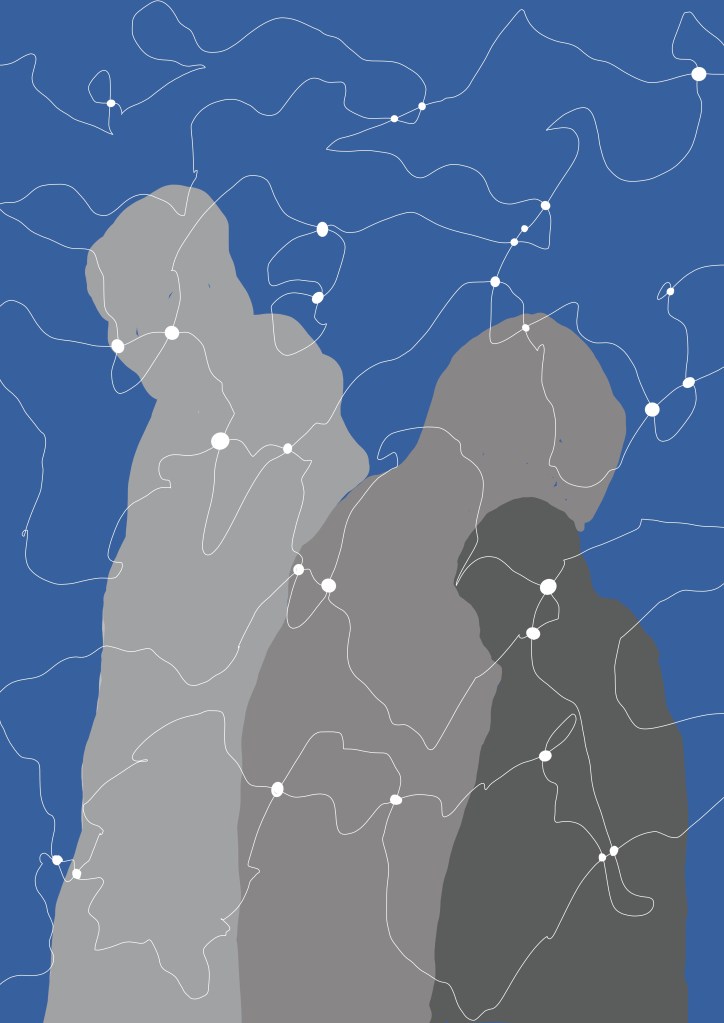
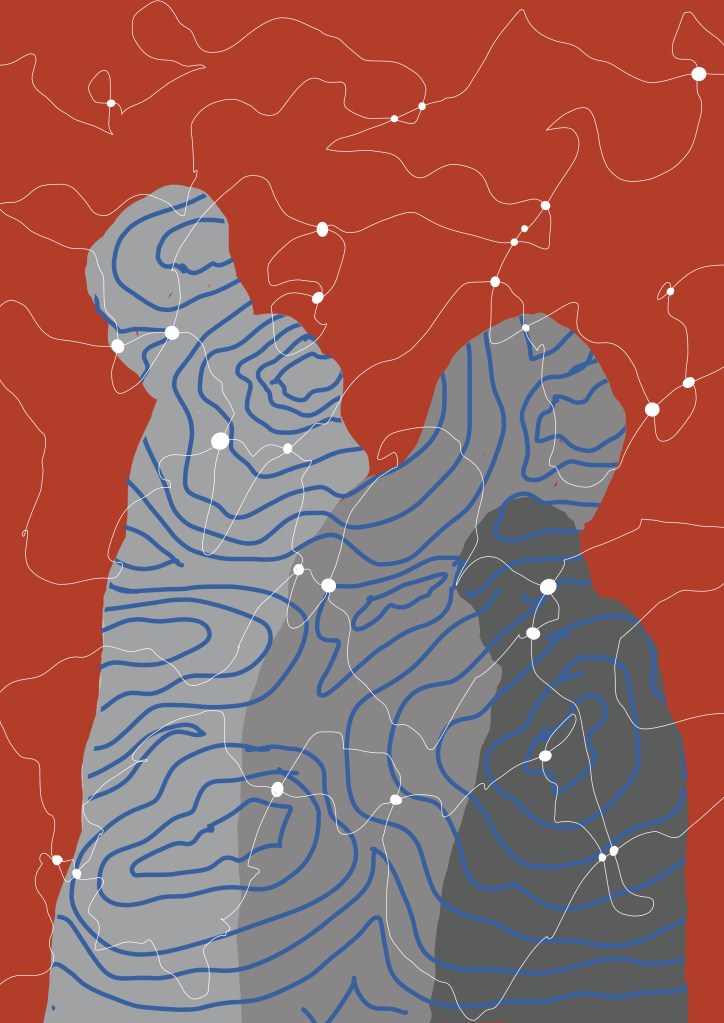
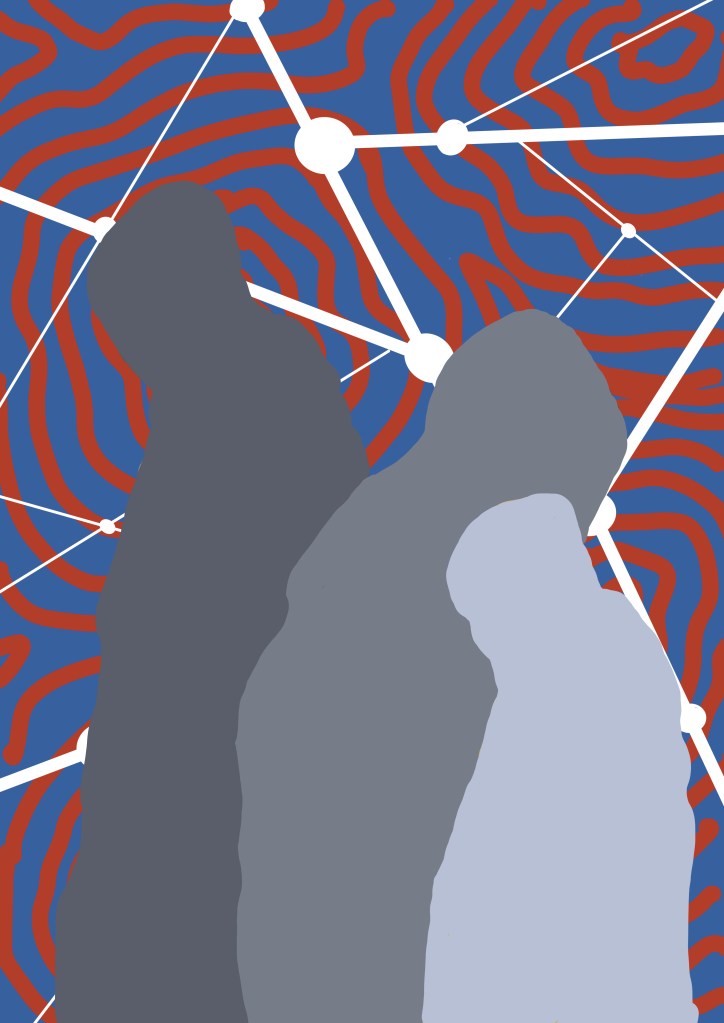
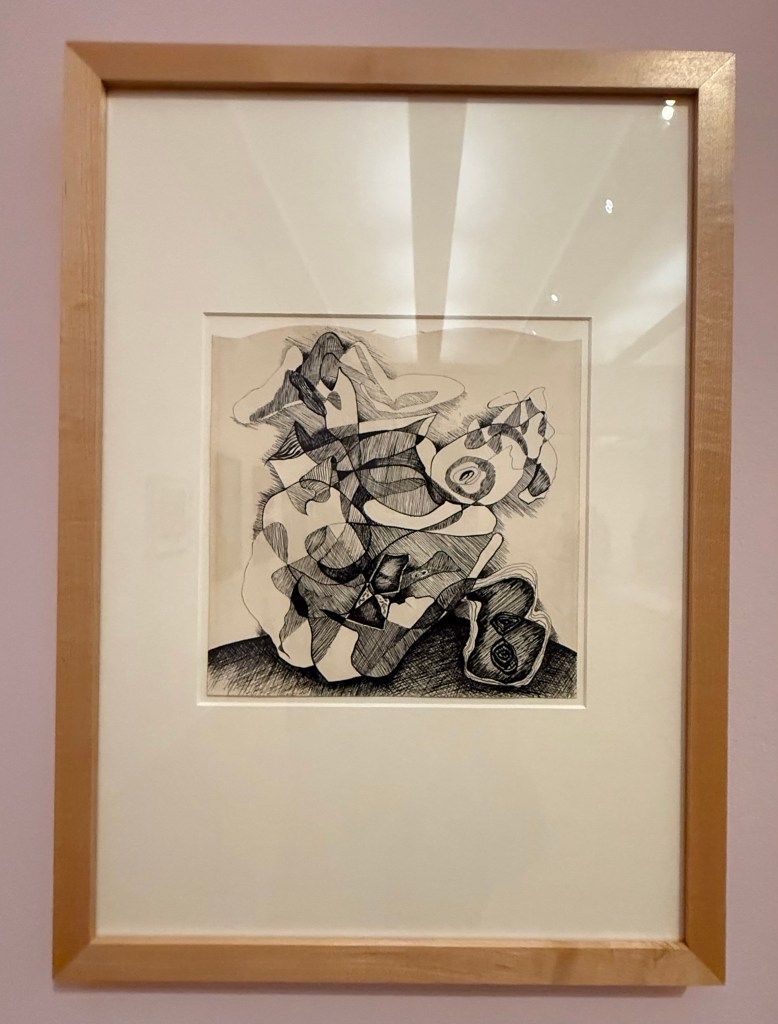
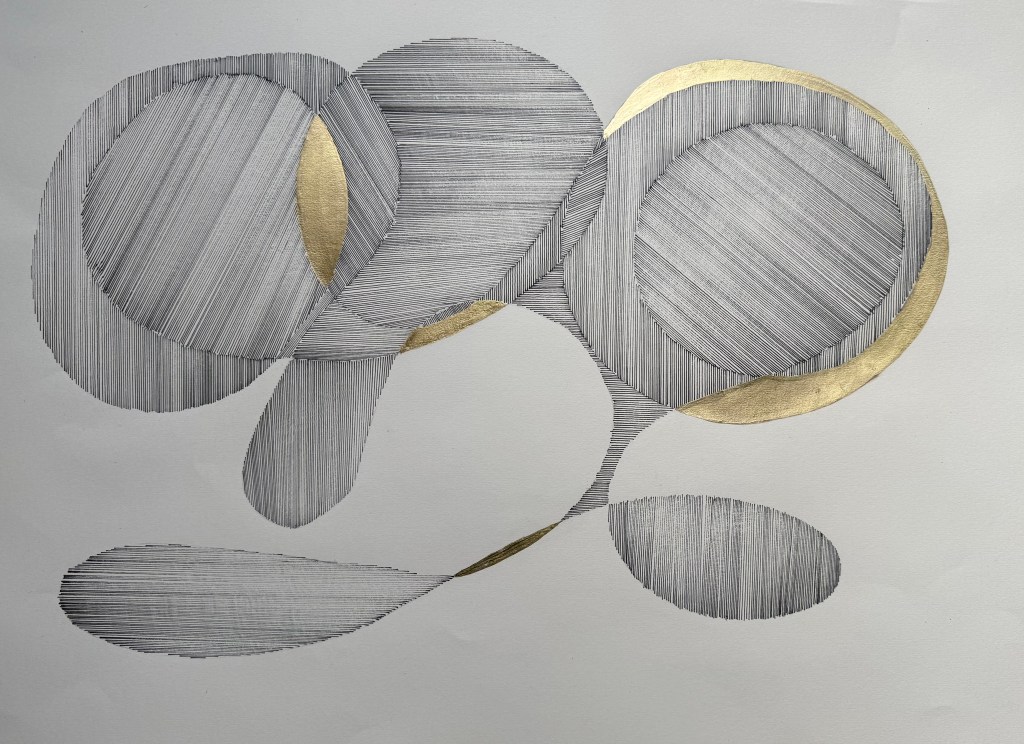
My daughter’s:

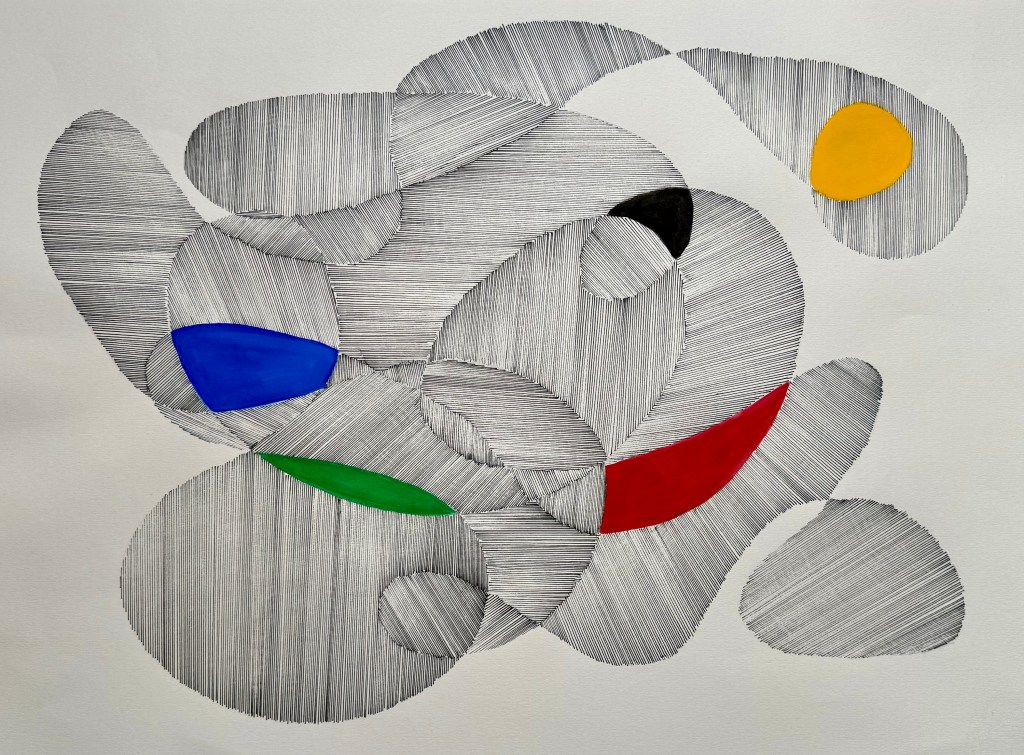
The first thing that strikes me is the relevance of selfhood and the act of becoming. Becoming happens through entanglement with others and selfhood is shaped by those relationships, and the world around us. These images embody my relationship with the people who drew the outlines. I didn’t choose the outlines but I can choose how I respond to them, how I engage, how I attend to them. I transform the outlines with time and devotion much as I do in the relationships with my husband and daughter. They then respond to what I have done and all of us are changed by the process.

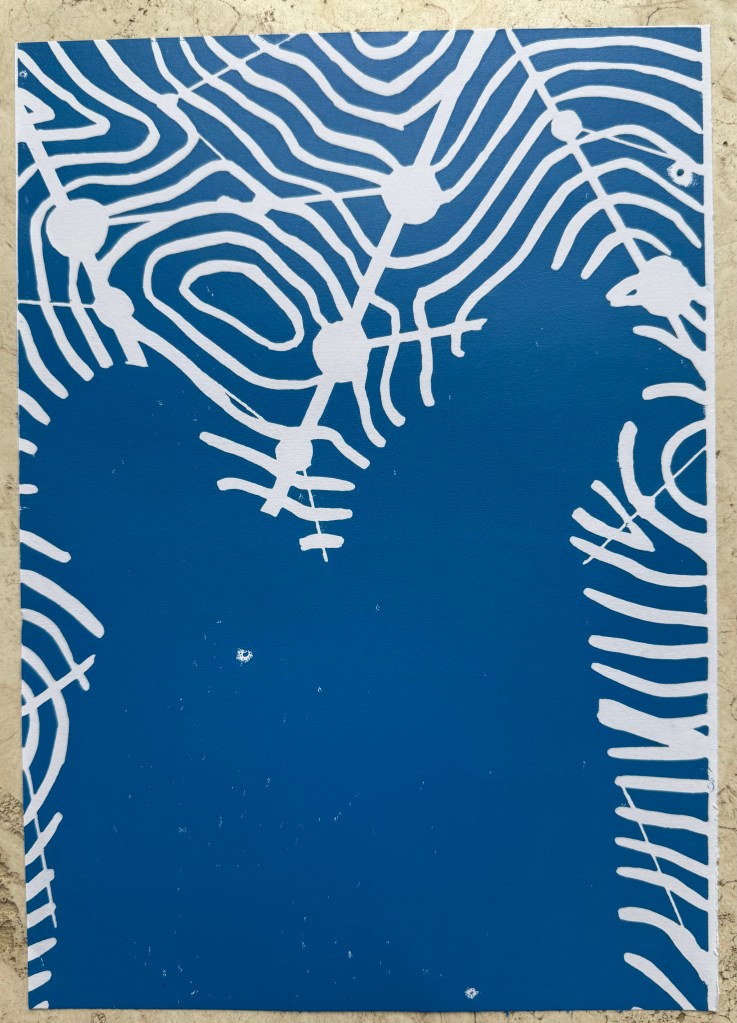
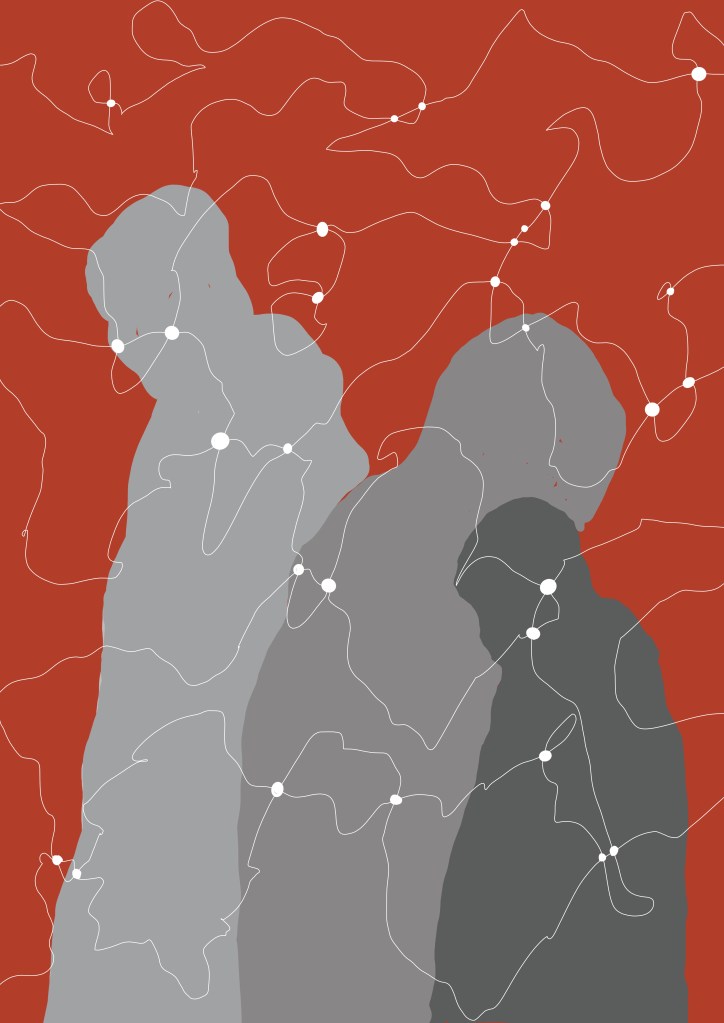
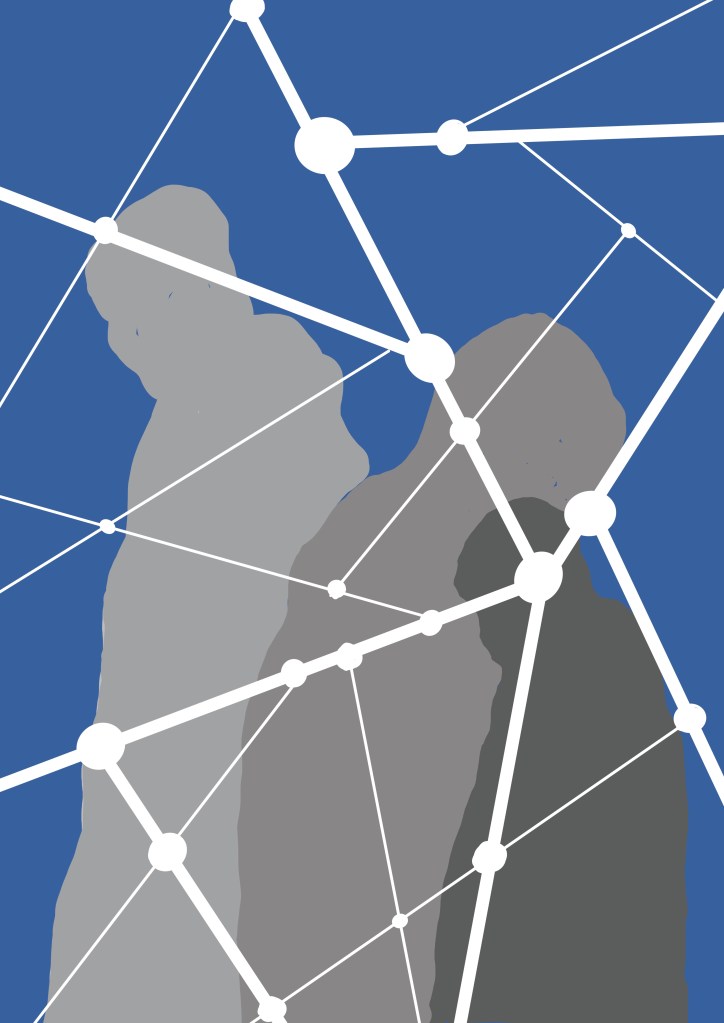
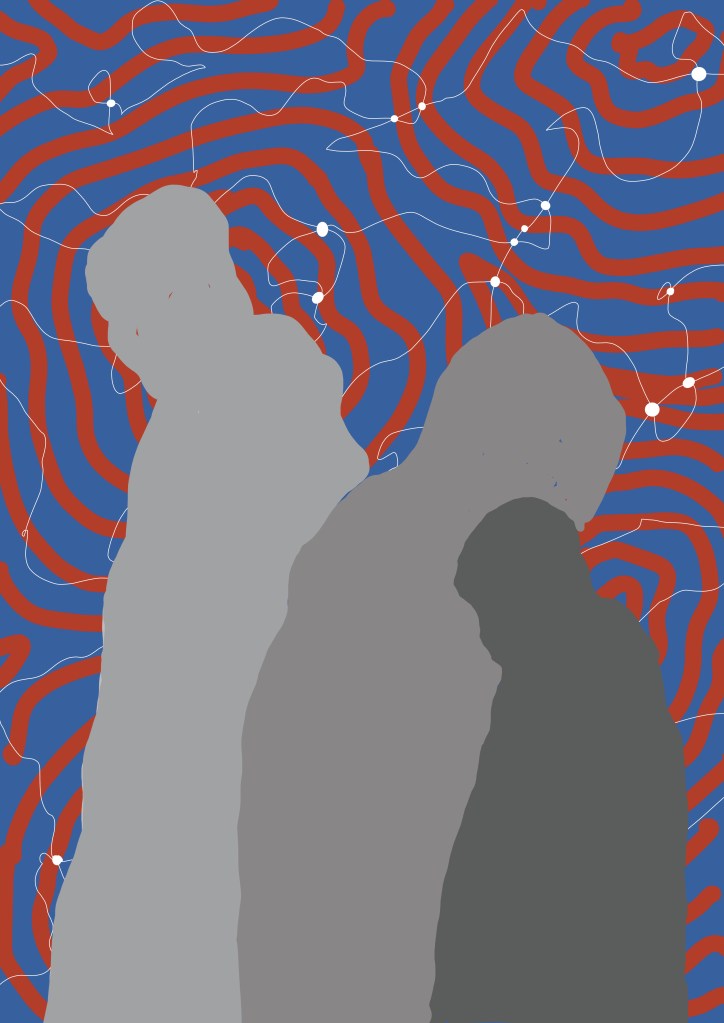
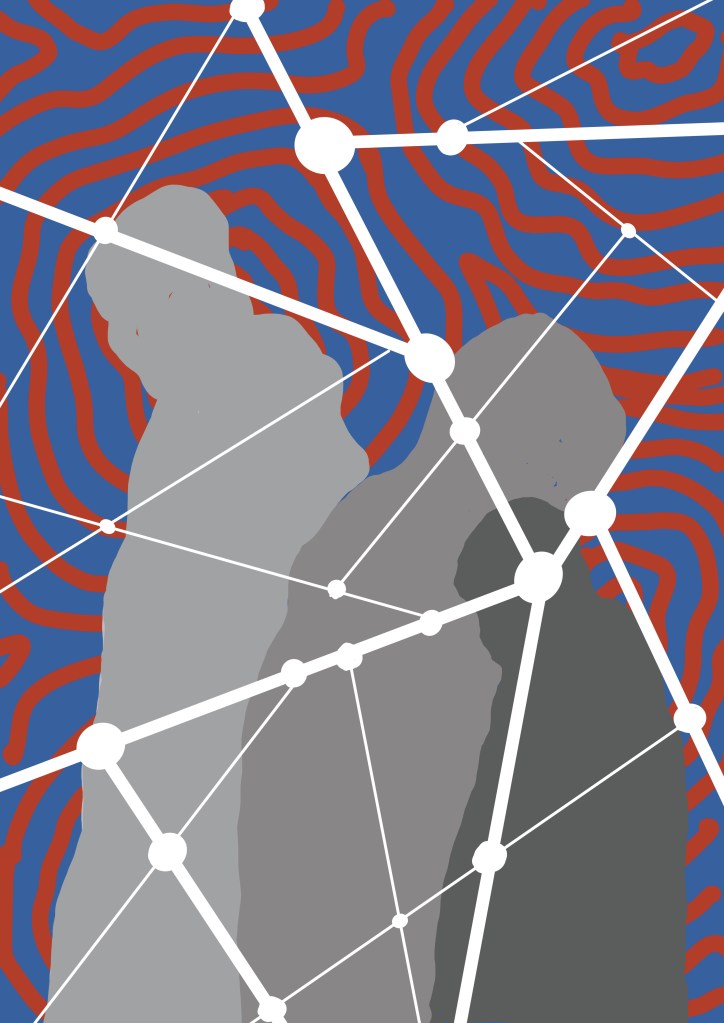
I really enjoyed making these images. The repetitive act of drawing the lines allowed me to switch off and to engage fully with the process rather than thinking about the result. I had no idea how they would turn out. The decision as to direction was made in the moment – it may not even have been a decision as such, just an intuitive adjustment of the angle of the ruler. I like that the mark-making is the subject of the images and consequently so is the process. The only active decision was which parts to leave out and how to deal with them. I love how the process is so evident – the times when the repetitive act and the sound of the pen on the paper made me lose focus and overshoot, how when I moved the ruler it left a spidery trail, how the areas where the lines cross form and edge which is at times irregular, creating a distortion, an interference, almost a vibration. Against the flat areas of colour the lines even appear to have a dynamism about them which I think is helped by the variation in tone – there are lighter areas where the pen is starting to dry up.

Whilst I was making them I felt content, as if two parts of myself were both being satisfied, balanced – the part which likes order and certainty and the other which likes the unpredictable and the unknown. There must be something about it which resonates with me because I subsequently went on to spend the following week experimenting with more images.

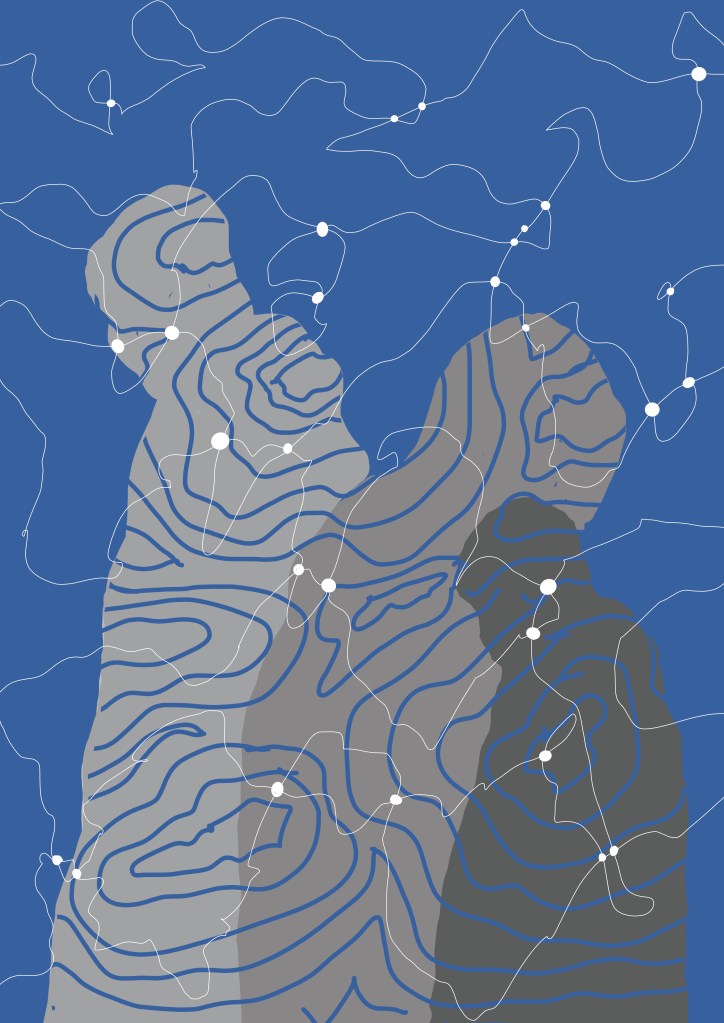
It would be interesting to see what the process is like involving people who aren’t experienced with making art to see how their outlines might differ in the sense that they might be less confident and their mark making more hesitant. Also, what about strangers? How might I feel responding to outlines which have not been made by people that I know?

Pushing Paper

I bought ‘Pushing Paper’ in the hope that I would find its contents enlightening, but primarily because I felt drawn to the cover. The image is ‘Some Interference’ (2006) by Richard Deacon, which he made during his residency at the Oxford Centre for the Study of Gene Function. According to the book, Deacon was initially trying to represent multiple surfaces on a flat plane – the paper splitting into interconnected layers. As things developed, he realised that what he was drawing was difficult to clarify.

Something about it really appeals to me. It reminds me of the doodle type drawings I’ve been doing (On Your Marks… & Lines). Aside from Etch-A-Sketch and Spirograph, this process entertained me for hours as a child. I would draw a random enclosed shape with overlapping lines which created segments to be coloured in. It takes me right back to my childhood. Maybe that’s why I’m drawn to it. Maybe it’s because it embodies its simple process as well as having a temporal dimension – the act of drawing each individual straight line. I like the darker line which is formed around the edges of the shapes where the lines have crossed.

Well, whatever the reason, I picked up the nearest pen, a leaky biro, and had a go.

It was a very satisying exercise, despite the blobs and smears. The ‘me’ at the beginning of this course would have discarded it. Instead, the blobs and smears are all part of the process, caused by the movement of the ruler and my hand, a moment hesitating too long in one spot. Nevertheless, I’d like to repeat the exercise with a proper pen, maybe a variety of pens of different thicknesses. In the meantime, I experimented in Procreate.

The Liminality of Memory

The idea of layering has always been in the background. It could be in the form of separate physical layers or the layering of media, or the remediation of images. I wanted to explore layering the moving image over the static image. I have to confess to adopting Lyberis’s approach of the monotone audio on his 3-minute video. To me, it’s the sound of silence, the sound that sometimes keeps me awake at night when I’m convinced someone’s running a car engine nearby or there’s an extractor fan which has been left on. It’s not quite right at the moment and it needs some more work, but I’m quite pleased with it so far.

https://youtu.be/7WoXFzFttHo?si=z348Mf6AF6fxwkku

Liminality

I felt a connection with this week’s visiting artist, Johanna Love. She remediates photographs and videos of car journeys.

I often make videos of car journeys, recreating those of my childhood when I sat in the back seat watching the passing landscape. My latest one was In A Flash.

The year before last, on the taxi ride from the airport to the centre of Vienna, the flat landscape gradually gave way to a looming mass of industrial buildings belching gases into the atmosphere: the scene took my breath away – it felt so out of place, intimidating, shocking. The area is called Schwechat, and is home to one of Europe’s largest inland refineries owned by OMV. In Spring last year it began producing green hydrogen, currently at a rate of up to 1,500 metric tonnes per year making an annual saving in CO2 emissions of 15,000 metric tonnes. I was back in Vienna a couple of months ago and I managed to video it from the City Airport Train.

https://youtu.be/6ZZ6BF5HOic?si=U0AiQS7Nfva_U3LI

I applied a neon filter to the first section to reflect my initial reaction of disbelief, slowly moving through monotone to reality. I particularly like the moments of transition, the overlay and monotone effect on the trees and the chimney stacks. Screenshots reveal moments when the image is neither one thing or another; moments of transience and liminality.

I’m intrigued by those moments. They inherently represent change, the process and becoming: they are what was once, what is now and what is to become. Becoming is fundamentally a state of liminality.

Edition

I thought about what size to do the print. If anyone buys it, I would like them to be able to frame it at home with a shop bought frame. So I needed to leave enough of a border so that it could go into an A3 frame without a mount, but not too much so that there is a lot of white space if they choose an A2 frame with an A3 mount. I decided to leave a 2cm border on the top and sides, and 4cm at the bottom.

I decided at the outset that I would not aim for perfection, that there are bound to be mistakes and that it should just be good enough.

It started off well. I made 12 prints

When I came to print the next layer of dark grey the registration of the print went awry. I went from feeling quite happy about the process to feeling despondent and frustrated. I made a few adjustments but it still didn’t work. So I stopped myself from ploughing on in the vain hope that doing the same thing again and again would somehow miraculously give a different result.

After some time away, it became obvious that the lino block, which had been washed and left to dry, was not sitting totally flat, which may have been the cause of the issue. So, I warmed it up and put it under a pile of heavy books whilst it cooled down. I came back to it a while later and tried making another print, which worked much better. Feeling a bit happier about things I went on and finished the rest of the prints. I must have inadvertently caught some of the cut out areas whilst inking up which caused some chatter on the base red layer (I clearly hadn’t taken on board the lessons from the first session) and on a couple of prints there was too much give in the blanket allowing the paper to be pushed down onto the cut out areas which caused marks on the red ink. This was resolved by adding in some folded newsprint which created some rigidity over those areas.

I liked the slightly mottled effect of the grey on the figures – it gave the sense of light falling on the figures or a lack of solidity. I wanted the head silhouette to be stronger so I burnished the head and the front side of the figure with a spoon to get a darker print. I liked the prints at this stage, but I felt that the two grey figures didn’t have enough definition between them, so I went on with the final gold layer.

My total of usable prints had reduced to 8.

Testing Plan A

So, Plan A was dependent on me being able to overprint the red with blue. I did a quick test print. The process blue ink I was using must have some transparency as it turned into a very dark purple, so I made it more opaque by adding opaque white which resulted in a kind of cerulean blue which I liked against the red, although the photos don’t do it justice.

I then prepped a sheet of A4 lino by lightly sanding and wiping with white spirit before staining it with an acrylic ink and drawing on the figures and the white lines. I went over the pencil marks with a chinagraph pencil to make them stand out more. As usual I had launched in without giving it enough thought and ended up having to reposition some lines although I couldn’t erase the chinagraph marks, which becomes relevant later on in the test printing. I used a metal ruler to cut out the white areas and filled them with cornflour to see how they looked, neatening up where necessary – the circles are bit all over the place, so I resolved to use a template when making the actual prints.

I created a registration board for the lino, drew lines where the paper was to go, and printed the first layer using equal parts process red and process yellow. Initially, I thought that I could mask out the figures using some tracing paper. Reduction linocuts work from light to dark ordinarily, but my image doesn’t really conform to that process. I knew one, if not two, of the figures would be a med/light grey and I wasn’t sure how that would sit on top of a bright red. I tried inking up whilst the mask was on the block and then removing it, but it was difficult to do because the mask kept on sticking to the brayer and the result wasn’t great. I decided to ink up the entire block for the rest of the prints. I also noticed that some of the chinagraph was coming off the block onto the prints.

Next, I cut out the contour lines and printed with blue ink. By this stage I had realised my previous error and masked the figures after inking the block, but before printing – a much better result, and I can’t work out why I hadn’t realised this to start with. However, after the first print it was obvious that the registration was off. I had thought that I had lined up the paper the same each time when I was printing the red layer, but I clearly hadn’t. I created a raised edge against which to place the paper on subsequent prints, but I had to accept that the blue and red layers wouldn’t line up on all of the test prints, which would cause problems in relation to the white areas.

There was also misalignment around the edges of the figures which could have been caused by poor registration on the first layer, but could also have been caused by a lack of accuracy in creating the mask, or even applying too much ink.

To complicate matters further, the paper I used was Japanese HoSho paper which being lightweight (90gsm) and strong makes it ideal for printing linocuts. However, it turns out that it is slightly smaller than A3. I already had some Snowdon 130gsm paper, so I thought that I would give that a go, to see if it would be a suitable alternative, even though it is heavier than the HoSho.

Other than a few areas where some bits had managed to get stuck onto the block, it seemed to print quite well.

I then cut away the rest of the block leaving just the figures. I wanted to experiment with both masking areas and inking up the whole block to see how the subsequent layers printed so I could decide on a final approach ie whether to use a mask or to layer the ink. I would have preferred not to mask any areas as it seemed to increase the risk of mis-registration of the print. But before I decided I needed to find out how the final metallic gold layer would sit on top of all the other layers. I noticed that there were some indentations in the outlines of the figures from where I had cut out the contour lines.

I also wanted to see how the grey would print on top of the blue as well as the red, and it seemed to fare quite well, although it definitely has a cooler undertone to it than when printed over the red.

The blue and grey layers seemed to dry slower than the red and, as a result, the dark grey/black ink didn’t print well, and also the cut away areas picked up some of some of the blue and transferred it to the prints. I had the same issue with the gold ink, but by that stage I had become a bit frustrated and impatient, and just wanted to see what the colours looked like together. There are agents which can be added to the ink to speed up the drying process but you have to be careful as to the amount used, as they can alter the colours. I could have swapped from oil based to water based inks, which I didn’t have. So I decided to make the best of what I had.

I know that I make things more complicated for myself than they need to be. I could have watched videos on how to make reduction linocuts before starting, but there is a part of me that thinks that learning on the job is a more valuable, if not more frustrating, experience, and that the lessons learnt are more likely to be remembered (and possibly put me off linocuts for good).

So, what did I learn?

  • Preparation is key
  • Registration is everything – I watched a couple of videos after the event and invested in some Ternes Burton registration pins and tabs
  • It’s preferable not to mask areas if possible but to cut away the lino on each layer
  • Don’t use chinagraph or anything else which could transfer from the block to the paper
  • Accuracy is important
  • I should have had a resolved image before I started, rather than winging it in the process
  • When cutting out the first and second layers I needed to ensure a clean edge with the figures by using a craft knife
  • I needed to check that there isn’t any ink on the cut out areas of lino before printing
  • The ink needed to be dry before printing the next layer

But, the most important lesson is that because of the number of layers and the time needed for drying, it would not have been possible to complete the print before the end of the month. I needed to go back to the drawing board and have less colours so that it reduced the amount of drying time etc. So I amended the image to just white, red, grey and gold.

Prints

I’ve decided that I would like to make physical prints for the Editions Sale, if possible, and I have resolved to do a linocut, on the basis that I don’t have an etching press at home, and I probably won’t be able to make it in to CSM this month. I also want it to be something which is relevant to, and an extension of, my recent work.

I’ve not much experience of linocutting, but this is a good opportunity to try and improve my skills. I’ve been experimenting with some of the mapping imagery that I’ve been exploring over the last few months.

Originally I thought about the line drawing I did and how form can emerge from lines. I used my father’s silhouette from Solitude to experiment.

The lines are all over the place as I did them freehand (how does Bridget Riley manage?) and there were a few errors. In the top half I experimented with rounded curves, whilst in the bottom half the lines are flatter.

I tried drawing out how it might work but in the end I decided that it would just be too difficult, and gave up.

I then looked at the contouring and the automatic drawing that I have incorporated into some of my recent work. I used a group of three figures, composition yet to be decided, and red and blue as the colour choice for the time being. I created multiple layers in Procreate which then allowed me to play around with possible combinations.

I like the red and blue contoured background with the figures standing in front of the straight white lines (last two images), maybe using gold leaf or even metallic ink (which would be cheaper) to add some additional interest. I’ve also put the darker figure in the background so that it gives the feeling of being in the shadows, even though, technically, lighter figures are supposed to recede, which in this case they don’t seem to because of the background.

So I’m sorted, apart from the fact that it will need to be a reduction linocut, something which I haven’t done before, put off by the suspicion that my brain doesn’t work in a reductive way, but there’s nothing like a challenge. Maybe I need a Plan B, just in case.

Last Minute

I made a last minute decision to go to Tate Britain on Friday to see the Ithell Colquhoun and Edward Burra exhibitions before they ended yesterday.

I didn’t enjoy the Colquhoun exhibition as much as I was anticipating, and I think it was because there wasn’t much surrealism.

As I was standing in front of Scylla, a woman commented to me that she had been expecting it to be a lot bigger as it had been used so extensively in the marketing of the exhibition. I assume that she had thought that because the image was used for marketing purposes that it was an important work of Colquhoun’s and because it was important and of value, that it would be large in scale – the old perennial issue of size.

Scylla, 1938, oil on board, 91.4 x 61cm

‘It was suggested by what I could see of myself in a bath… It is thus a pictorial pun or double-image in the Daliesque sense – not the result of a dream, but of a dreamlike state.’

Colquhoun used the Surrealist process of decalcomania to produce a mirror image of randomly applied marks which she then used as a starting point for her work.

Gorgon, 1946, oil on board & its decalcomania counterpart of oil on paper

’I meant to paint a ‘Guardian Angel’ but the result of the automatism was so horrific that I had to call it a Gorgon instead’.

She also used a technique called parsemage, which involved submerging paper in water which had powdered chalk or charcoal on the surface.

These processes offered intuitive access to the unconscious mind, according to the accompanying blurb.

Colquhoun also utilised automatic drawing.

They remind me of my pen drawings in On Your Marks & Lines.

I decided to give parsemage a go – I think that you can do it with anything that can be ground to a dust – I used powdered graphite which has a slightly metallic quality to it. I was really pleased with the results.

I then remembered a post on Instagram of a potter decorating bowls by blowing bubbles. I’ve used bubbles in wet cyanotyping before, so I decided to try it with the powdered graphite. I really like the delicate lines which were created and it was fascinating watching the effect of the bubbles popping – it reminded me of looking at cells under a microscope.

I then experimented with acrylic ink – maybe I should have realised beforehand – but it failed miserably. I wanted to try again with a water based ink, but I couldn’t find them. It might offer a more effective way of creating something akin to cells, than my previous attempts, so I’ll try again when I eventually locate them.

In A Flash

Whenever I don’t have to drive, but am driven, I like to look out of the window at the world as it passes by, to daydream. It reminds me of my childhood and Sunday afternoon drives, safe in the car away from all the witches and ghouls which were out there in the woods, which were left behind – those were the days when you didn’t have to wear seatbelts – I was fascinated with looking out of the rear window to make sure that we weren’t being followed, to watch as we left behind.

I remember my father driving us in the darkness to catch the ferry back to England to visit my grandmothers, the bright lights of the car dashboard, of the ferry and port. The moment of held breath as we embarked, over the ramp, the car laden with all of our stuff, low to the ground. Even now I get a buzz of excitement when driving late at night and the heavy machinery rolls out onto the motorway, the flashlights, the hi vis, the noise.

Over the last year I’ve started filming the landscape as it rushes by. We went past Stonehenge on our way back from Exeter in June with all of our daughter’s stuff in the car.

The sky is more or less static and the mid ground moves a long quite slowly, with Stonehenge almost gliding across the screen. And then there is the fast moving foreground – I find the fence line and the traffic paraphernalia fascinating – the way in which the posts seem to be animated, punctuating the foreground, jumping up and down, reminding me of the graphic equalisers on my first stereo.

I wanted to create an image with less immediacy, with some distance, some sense of layering and so I experimented by filming the footage from my iPad with layered clingfilm over the screen.

I like this shortened version, I think it has more impact, or maybe it gets to the point a lot sooner – my social media shortened attention span at work.

I played around with different effects and took some random screenshots.

I like the abstract nature of some of the images, the sense of ghostly imprints, an image which is not quite there, or that was there, but has since moved on.

Sticker

I brought in my one remaining pinhole camera the other day. It was really disappointing – although it had captured some good trails of the sun, it had fallen sideways (my bad) and the constant switching between really hot and cold weather recently must have caused condensation to form inside the can. It’s a shame because it seemed to me to be a good way of capturing the passage of time in a static image. Never mind, I may try again.

I’m not very techie and when I was converting the original image into black and white on my phone before I got into bed last night, I accidentally created a sticker. I’ve never really paid much attention to the white line which cuts out the sticker before, but on an abstract image it was fascinating to see where it went and what it chose to cutout. I decided to screen record the process, add some filters and play around with the replay speed.

I particularly like the one above – it reminds me of paper burning around the edges.

I used the image from What Was I Thinking? as it has both curved and straight lines amidst the multiple figures, and I was interested to see what path the line chose to follow.

Finally, I wondered what would happen if I tried an image which has a myriad of shapes within it and a white line of its own, so I used an image from Carbon Dating.

I had a great time experimenting, but when I finished an hour later my brain was still trying to process it all and thinking of how I might be able to develop it. It’s proving to be a tiring day today.