I haven’t made a book before. I’ve watched a couple of YouTube videos. I told myself not to have any expectations.
I copy and pasted my blog posts into Word booklets. Each booklet is 5 A4 sheets which is 10 sides and therefore 20 A5 pages amounting to 1 signature. The book will have 10 signatures (totalling 200 pages) and already I know that there will be more than one volume.
It was a laborious task of formatting, copying and resizing the images and creating QR codes for the videos.
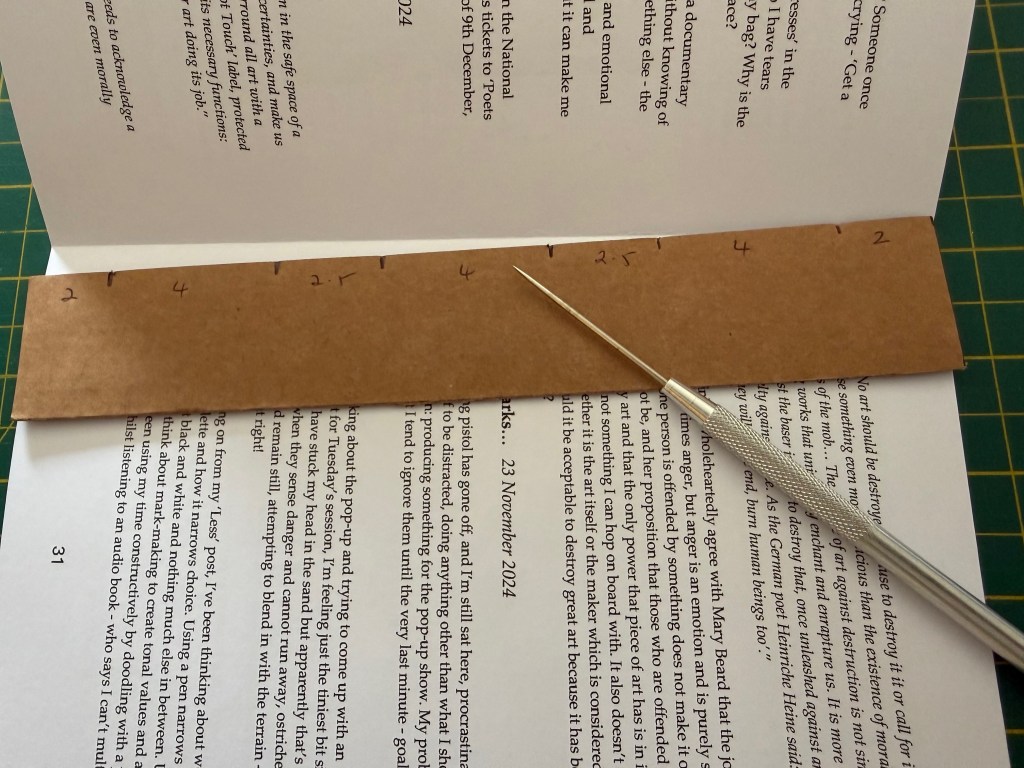
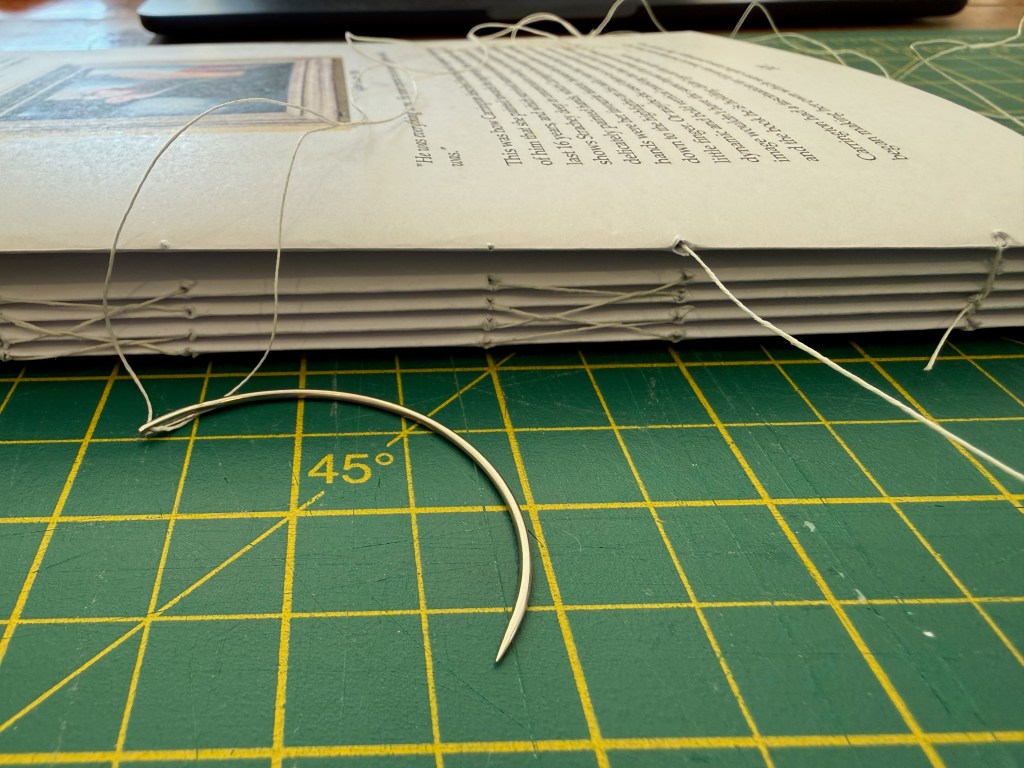
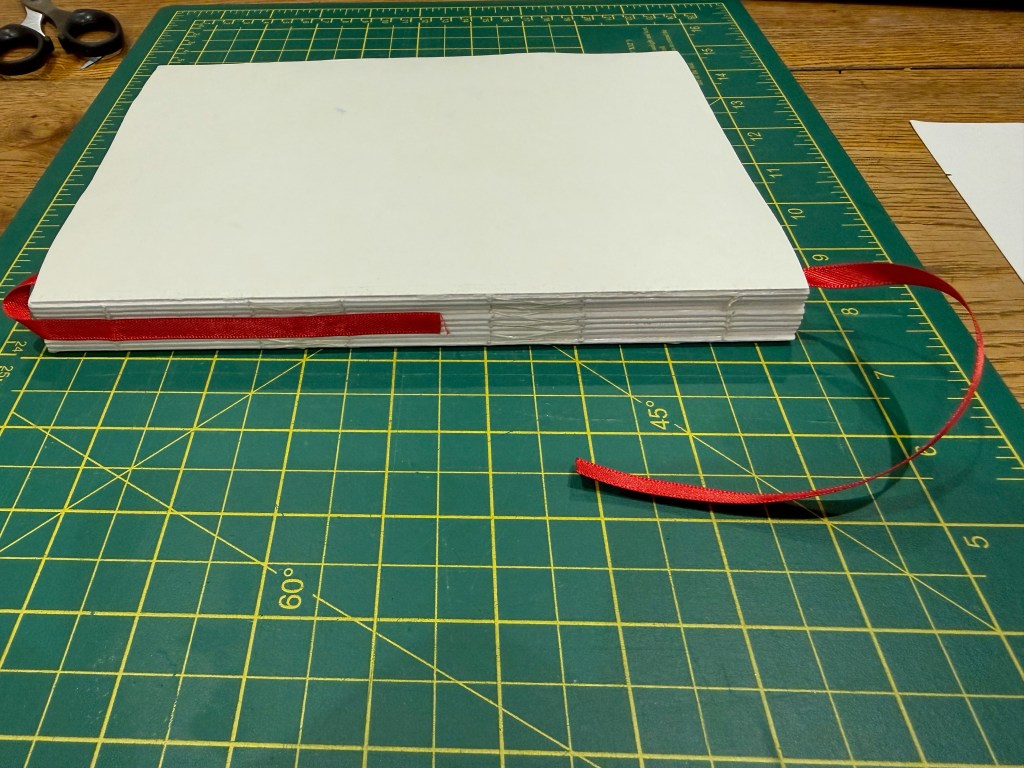
Having printed each of the signatures and folded them, I set about sewing them together using linen thread, which I waxed using a beeswax candle, and an upholstery needle. The wax helps prevent the thread from fraying and tangling. First, I had to use an awl to puncture the holes.


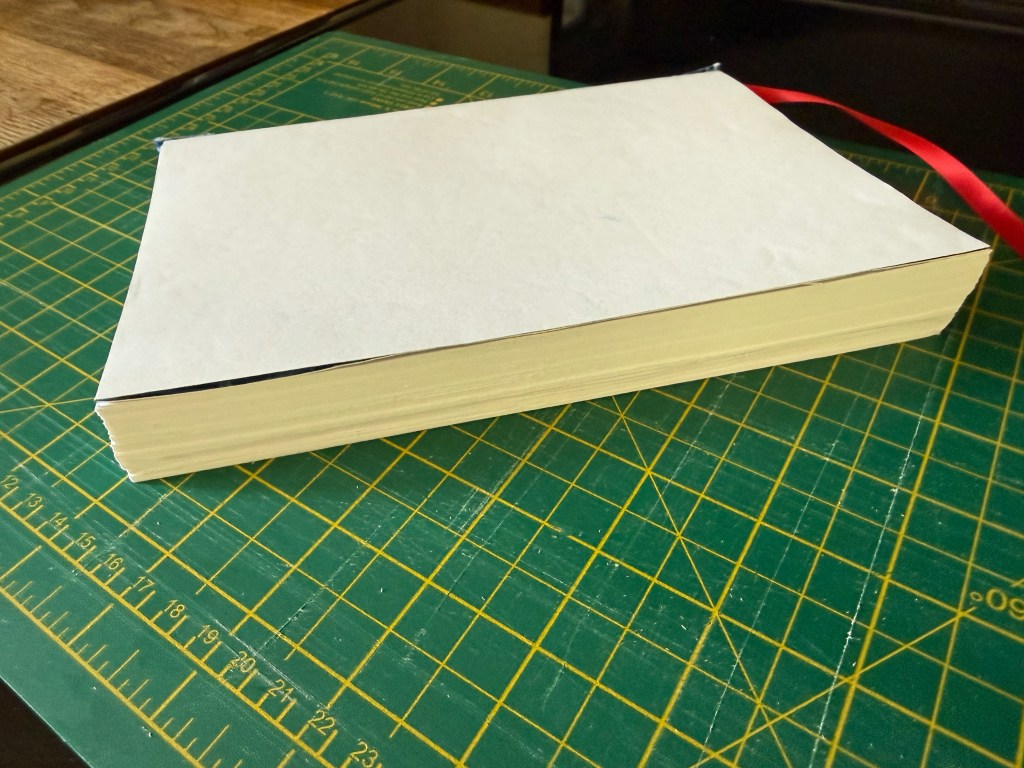
Then I applied two layers of archival PVA glue to the spine and attached the ribbon.
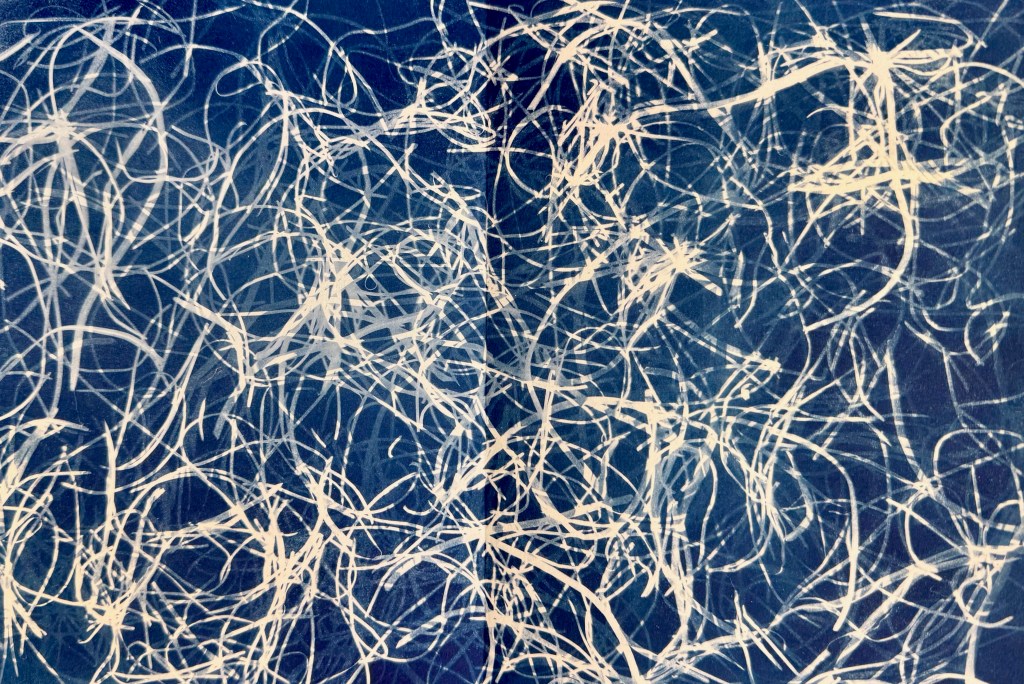
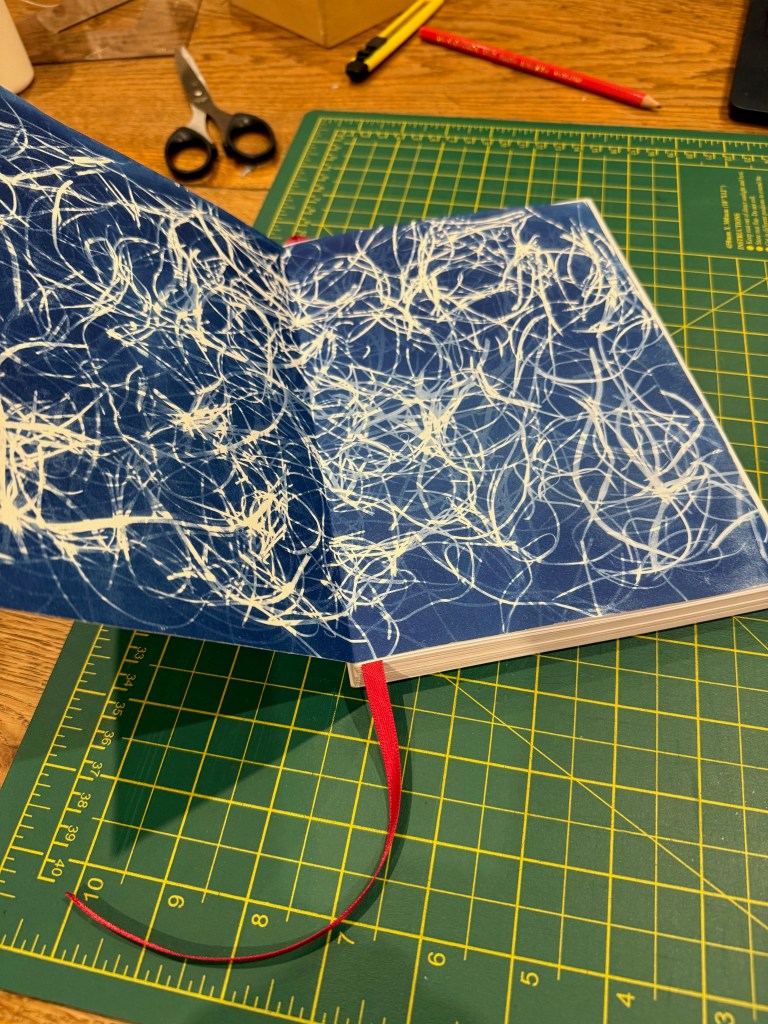
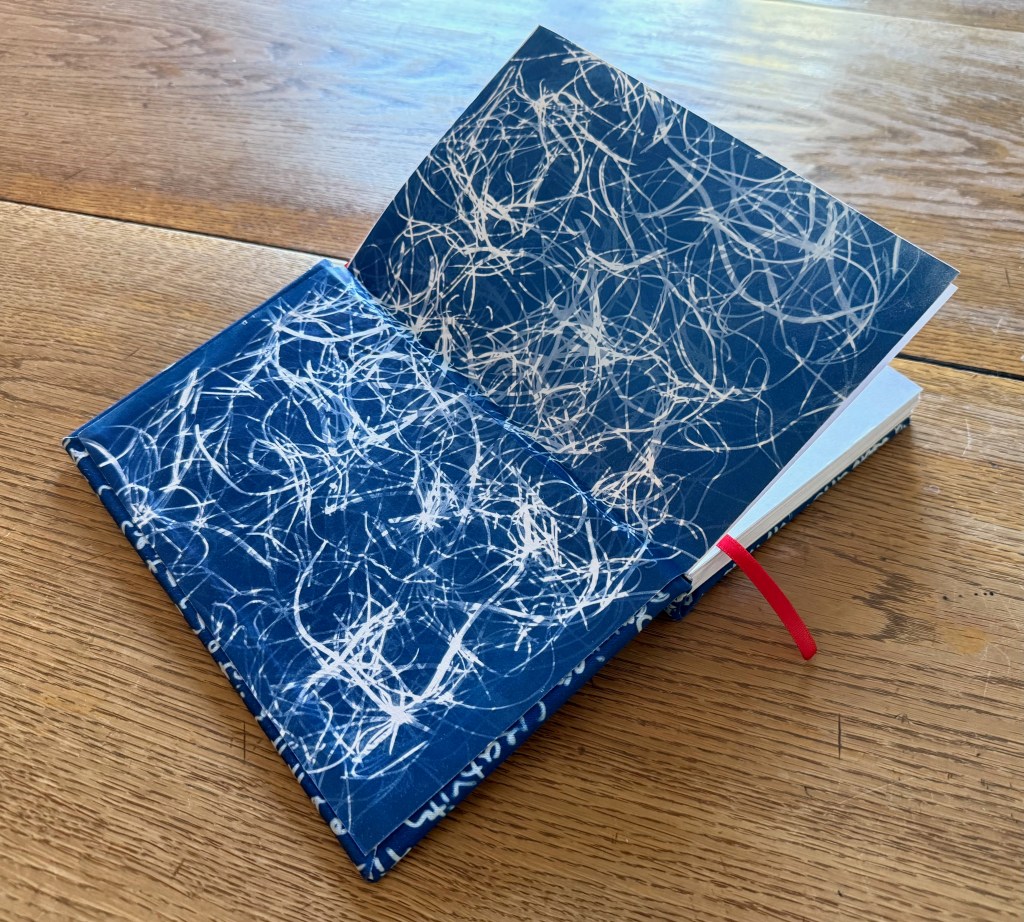
Next I had to attach the end papers. I decided to use a couple of cyanotype prints that I had made using the lino cuttings and the shredded cardboard.

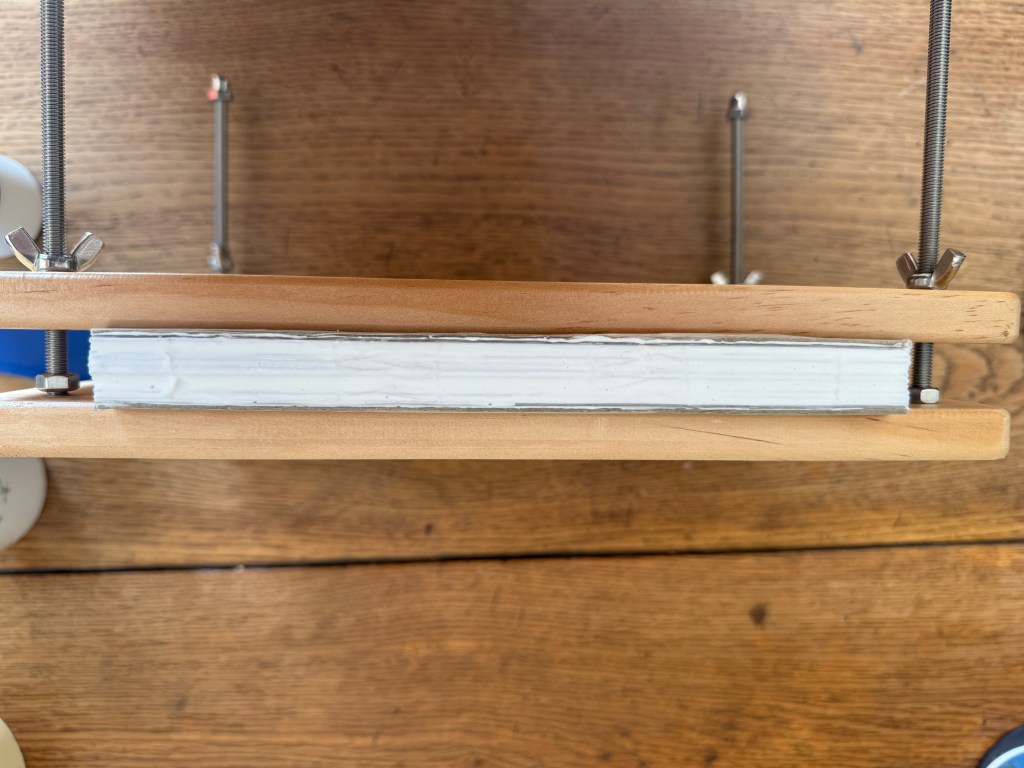
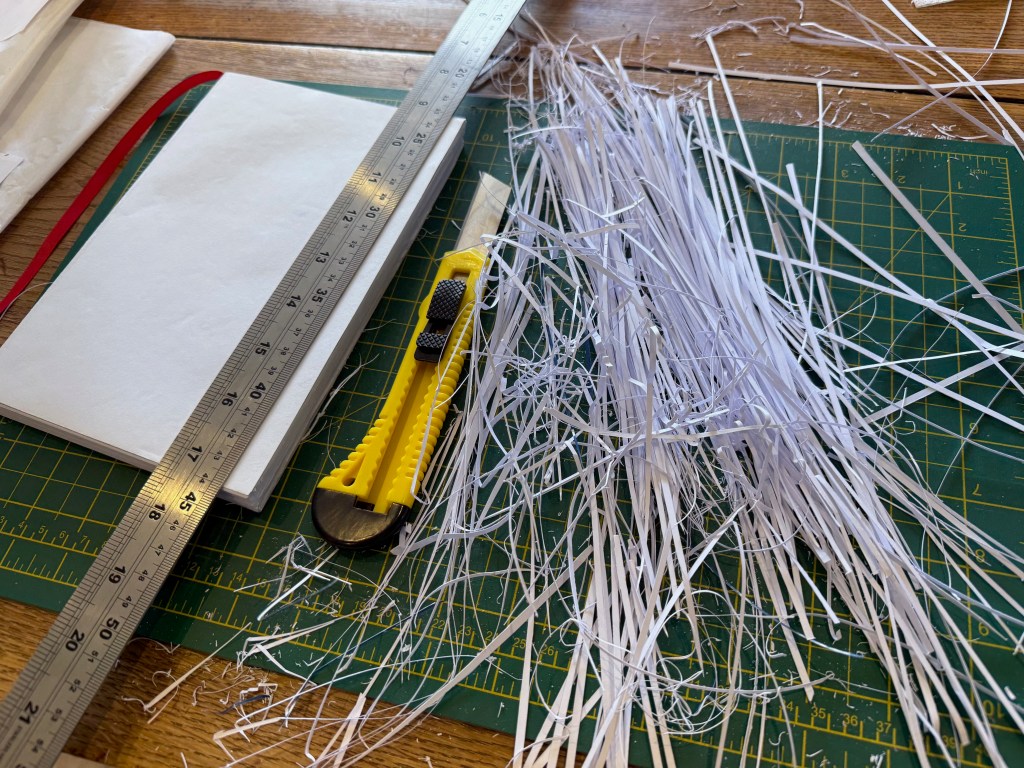
The next step was to trim the edge of the text block. When the paper is folded into signatures the outside sheets have further to wrap around and so protrude less than the inner pages. When they are sewn together it creates a zig zag effect down the edge of the pages and so this needs to be tidied up. A stack paper cutter would be ideal in this situation but the woman in the video successfully used a metal ruler and a craft knife.
This is where it all started to go wrong. I think that the craft knife I used was too lightweight and the blade flexed so that the cut edge was all over the place. I tried to remedy it by re-trimming and unfortunately it turned into something akin to the time I trimmed my daughter’s fringe and in repeated efforts to level it out had to resort to taking her to the local hairdresser to get it fixed – ok, made to look less awful.
In an effort to straighten things up I clamped the text block between two pieces of grey card and used 220 grit sand paper to smooth down the edges, which seemed to make it a bit better. I appeared to be back on track.
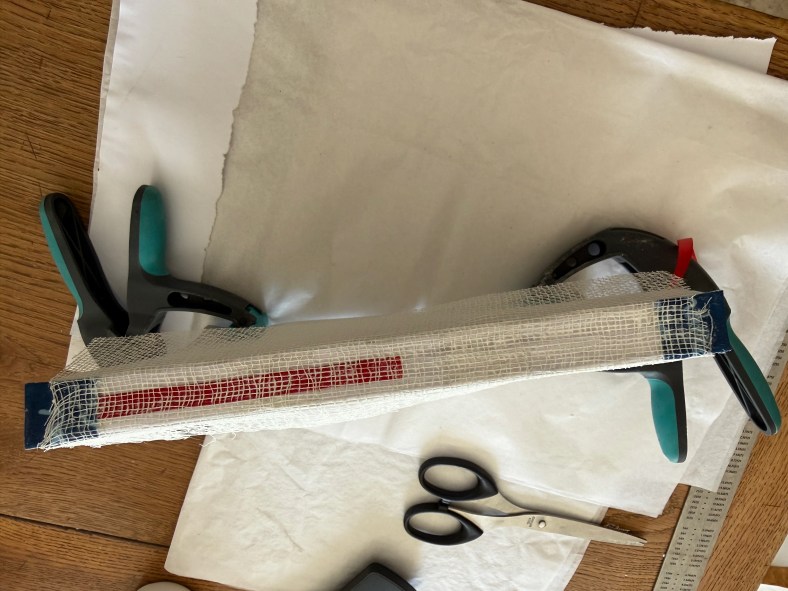
The next stage was to make and attach the head and tail bands, and the mull.
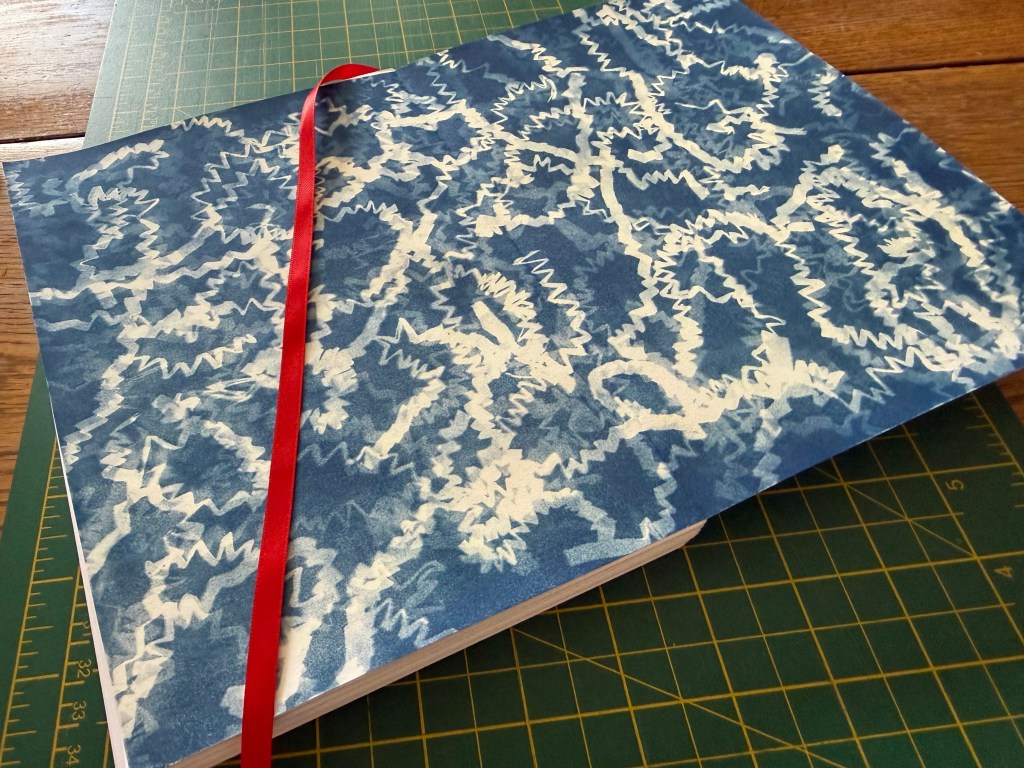
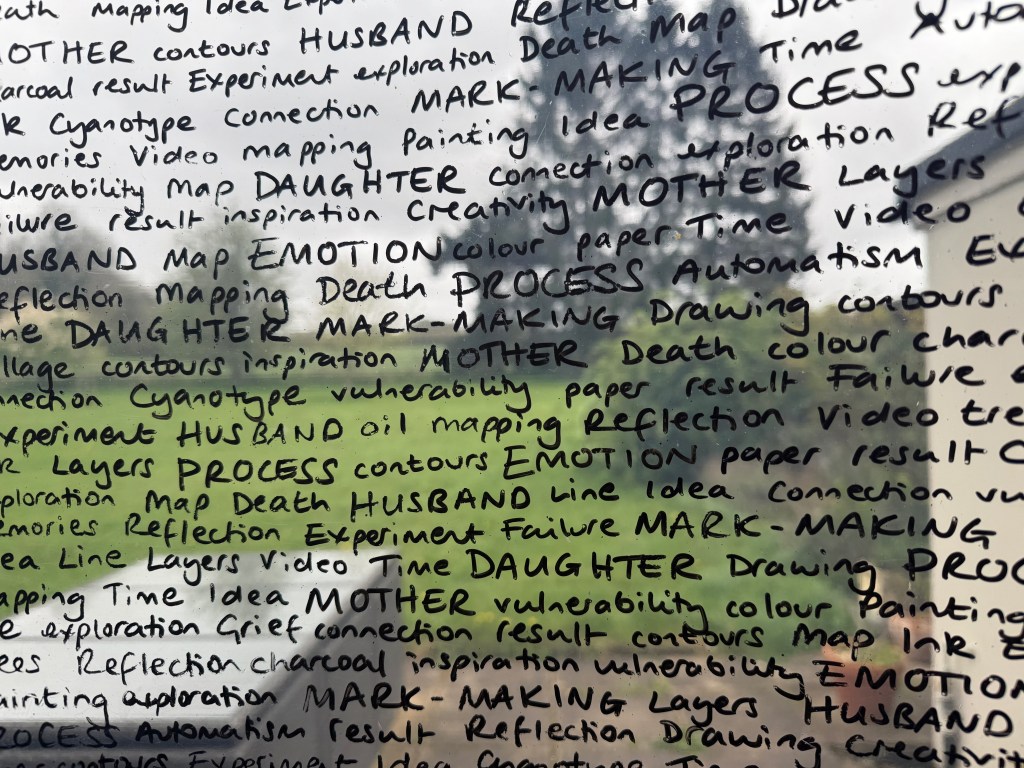
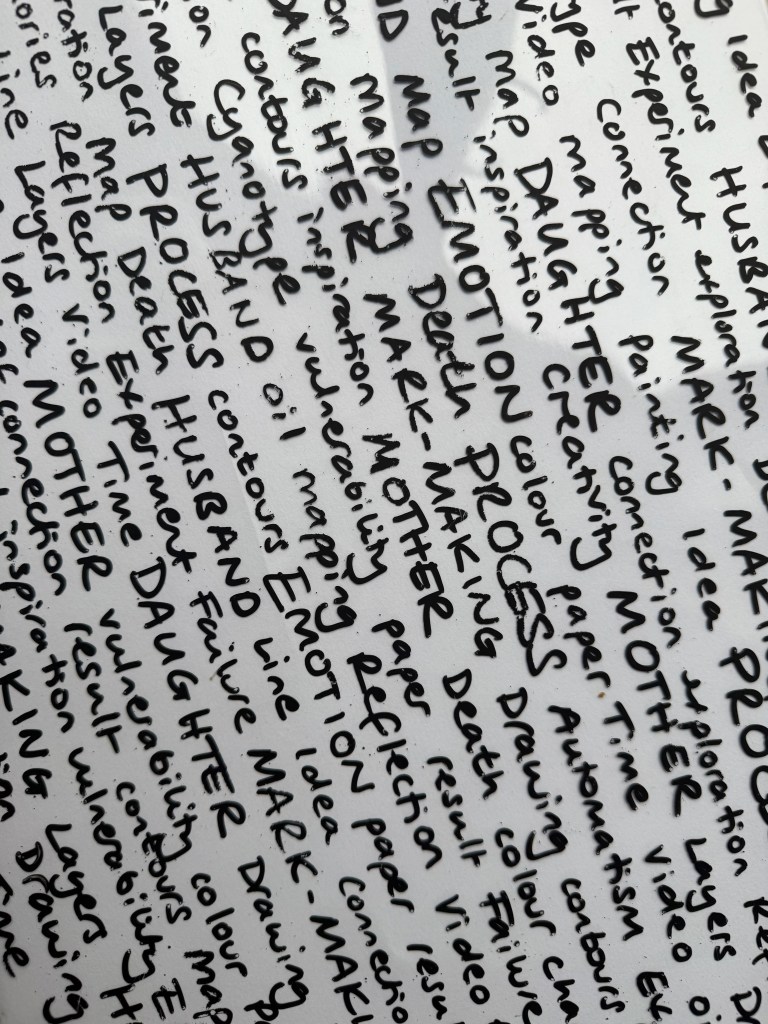
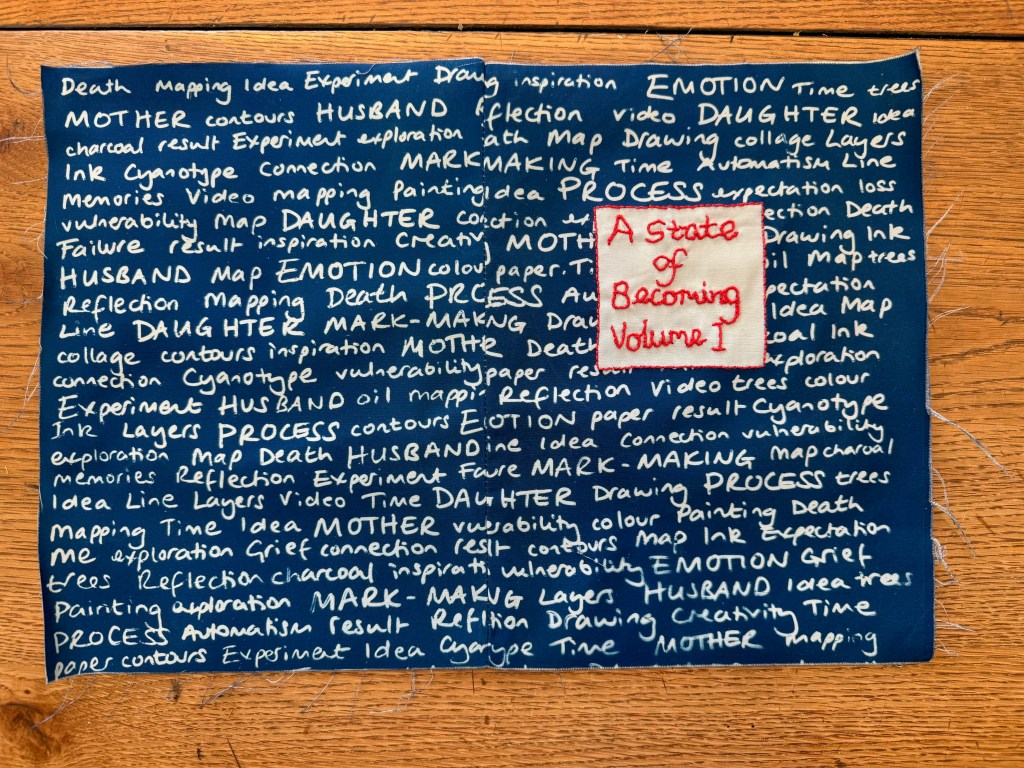
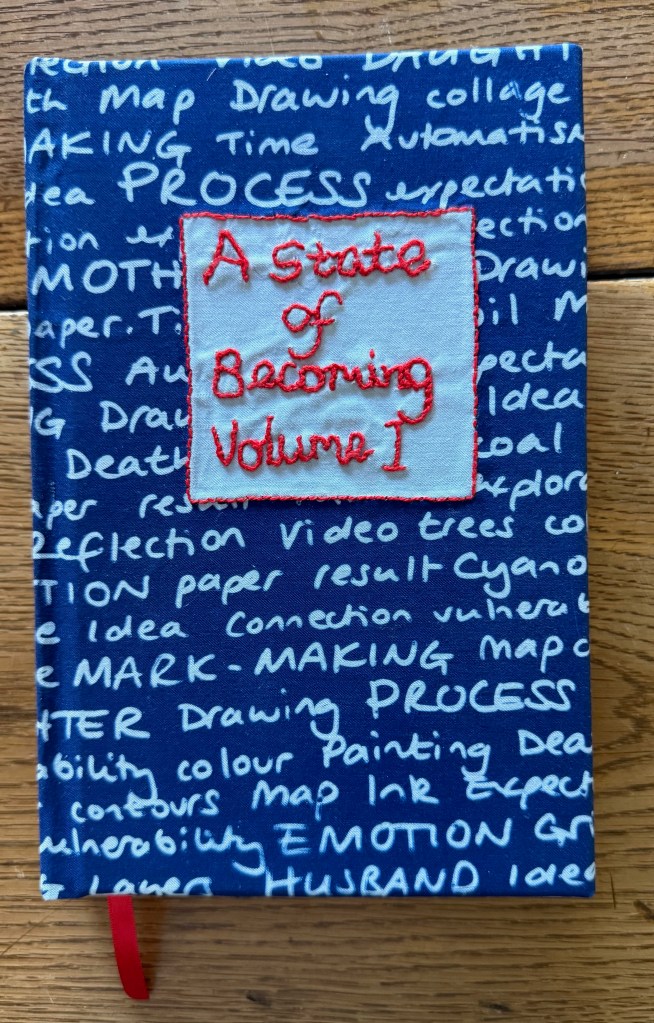
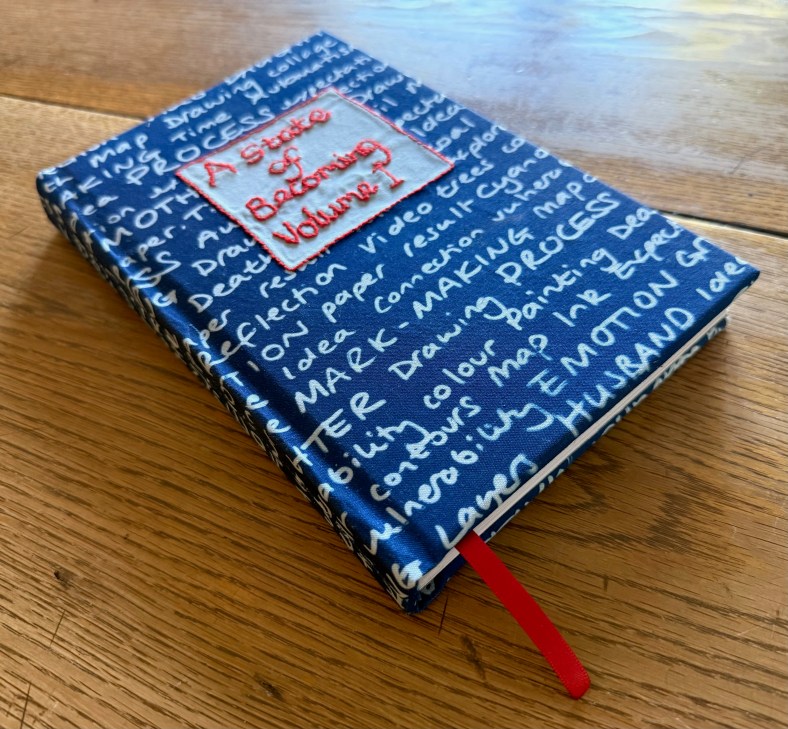
I then had to start thinking about the cover. I decided to make my own book cloth and made a cyanotype using some of the main words from my blog’s tag cloud. I wrote them onto an A3 plastic sheet and used some pretreated fabric, which unfortunately only came in A4. I masked out an area onto which I then ’embroidered’ the title.
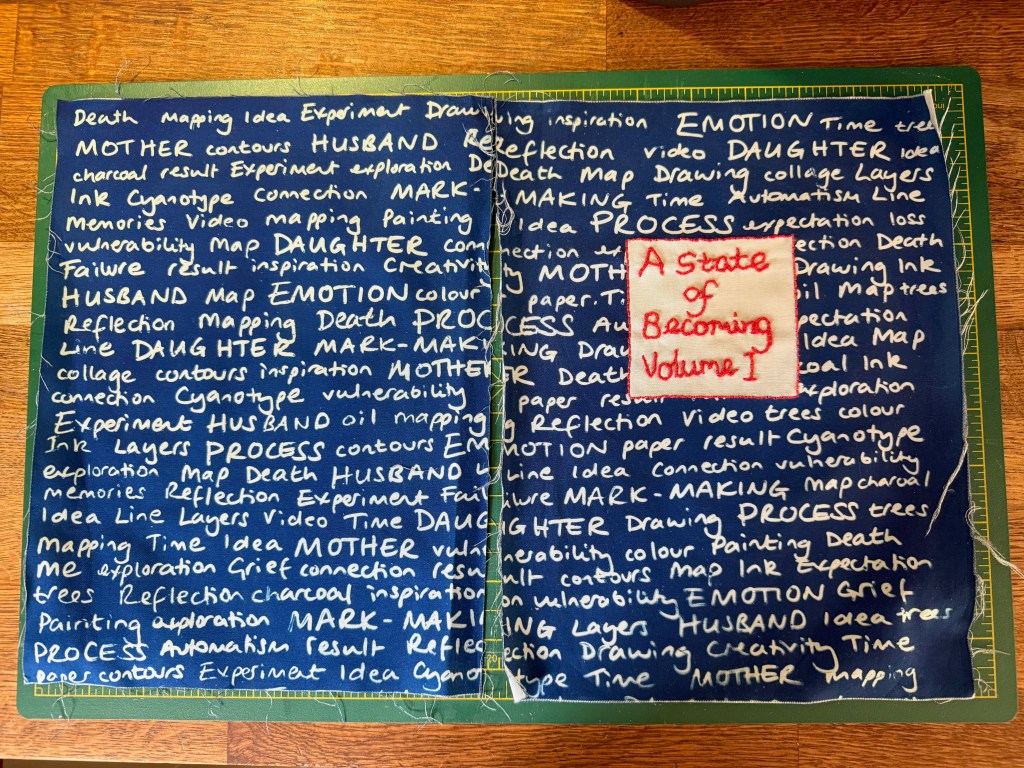
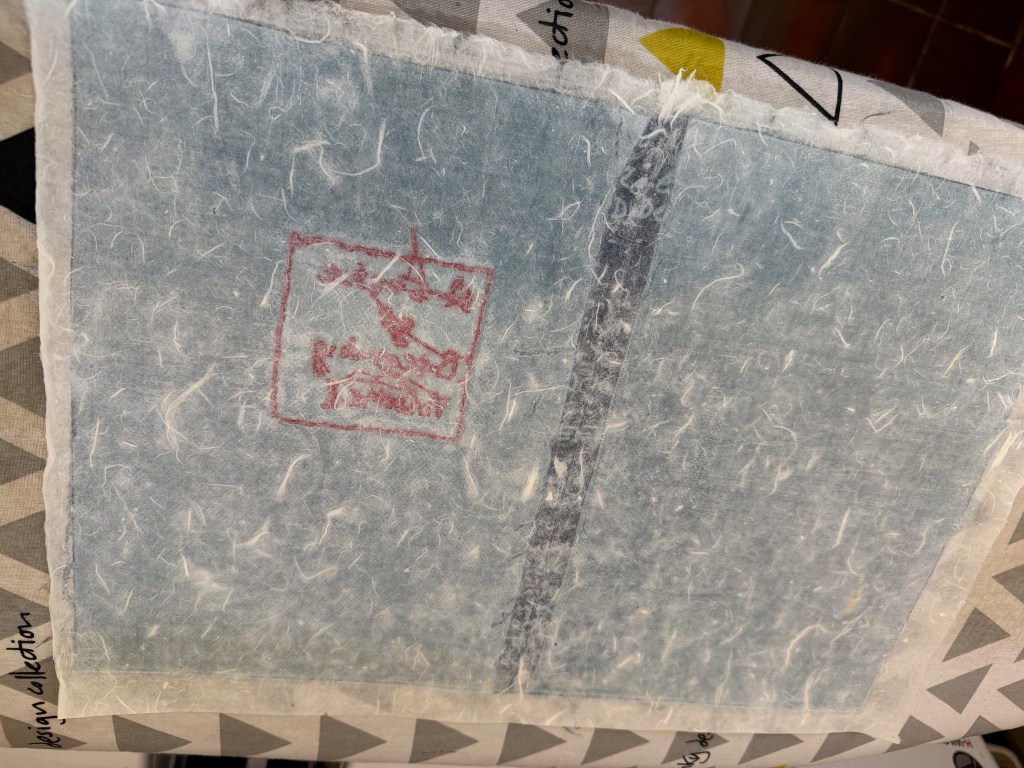
To make it into book cloth I sewed it together in such a way that the seam would run down the middle of the spine – unfortunately because of the measurements I couldn’t do it so that the words matched up. I attached some Japanese mulberry paper to the reverse using Heat and Bond.
I then measured and cut the front and back boards and the spine, and then taped them together to see how they fitted the text block. The idea was to trim the long edge of the front and back boards so that they overhung the text block by 3mm. And this is where it went irretrievably wrong. I’m not quite sure what happened.
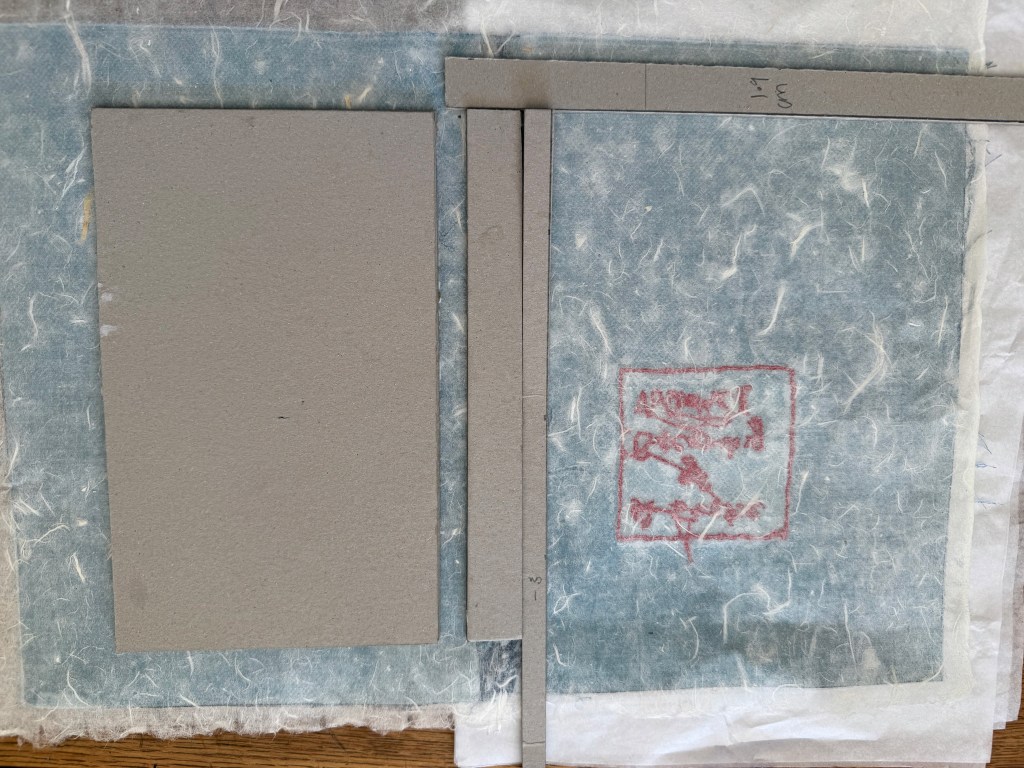
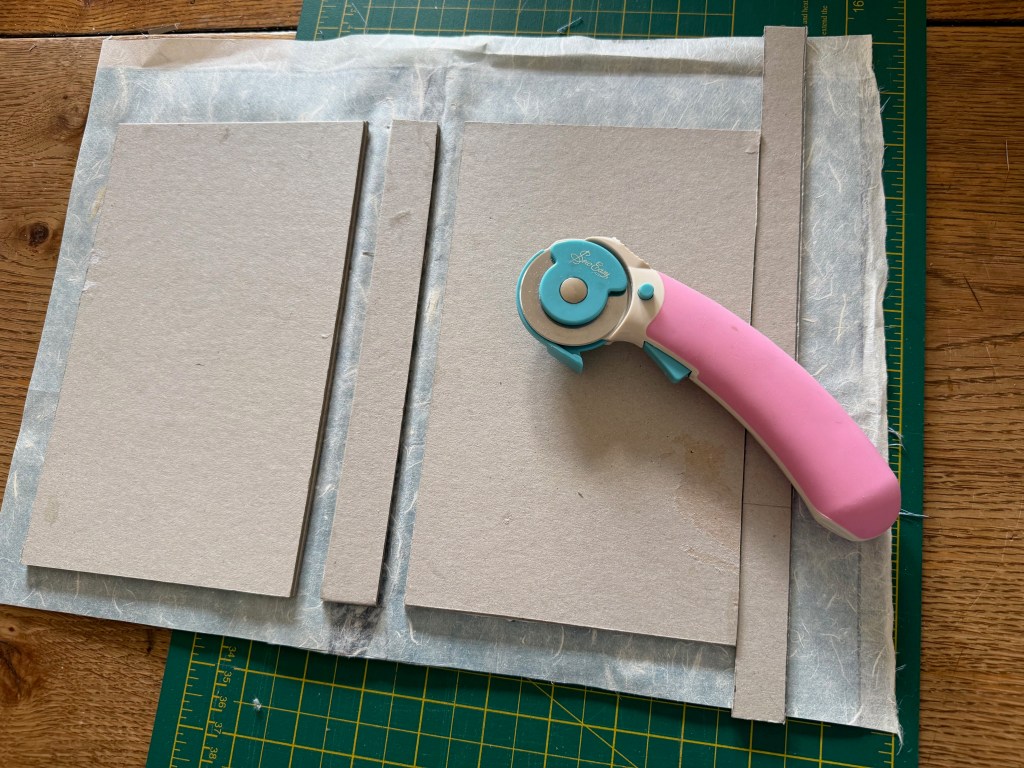
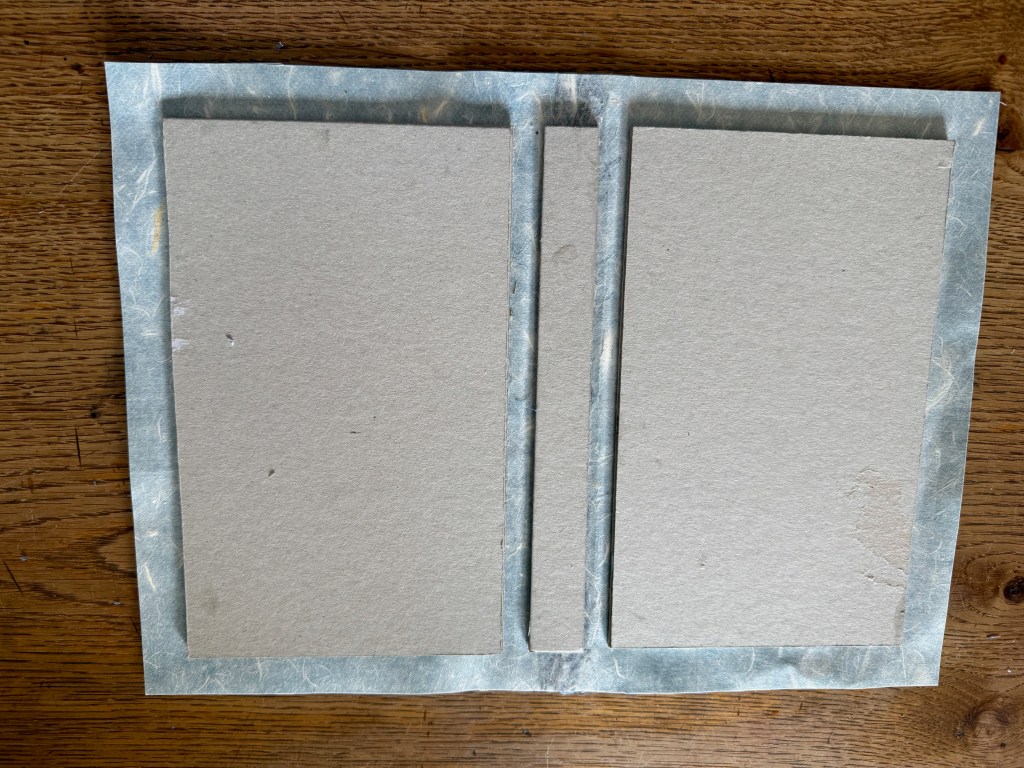
I don’t usually do fiddly and I thought that I was being extra careful in my measuring and cutting but something went wrong somewhere and 3mm doesn’t leave a lot of wiggle room. When I had folded over and glued down the edges of the book cloth I tried putting the text block inside only to find that not only was there no overhang but that the paper protruded beyond the edge of the cover in some places.
I tried removing the spine board and replacing it with thinner card and sanding down the edge of the paper. Eventually it fitted so that there was a miniscule amount of overhang but the price was that the text was very close to the edge of the page. Nevertheless, I carried on because I wanted to complete the process.
So there we have it.
What do I think? I’m amazed that I’ve managed to produce something that looks like a book. For a first effort I’m pretty pleased with it. I feel like it’s a real achievement. Obviously there are some major issues with it but on the whole apart from the last stage I think it went quite well. I really like the cover and the end papers – I think that they work really well. I clearly didn’t set out thinking that it wouldn’t work, otherwise perhaps I would have used substitutes as I’m now going to have to make them all over again. But now that I know what I’m doing and where to be careful, it won’t take as long.
I will remake this book, but not yet. I need to feel like I’m making some progress so I will get going on volume 2, which will hopefully go a bit better, and then come back to it.
On the whole it was an enjoyable process – I enjoyed learning something new. What will I do differently next time? Oh, quite a bit! It was a great exercise from which I learnt:
- accuracy in measuring and cutting is crucial
- I need to get a more robust craft knife or alterrnatively contact my local printers to see if they can do the trimming for me.
- The paper used for the end papers was cut from larger sheets and either wasn’t truly A4 in size or had shrunk after the cyanotyping process as they turned out to be slightly too small, but as usual I thought that I might be able to get away with it. I didn’t. Next time I should make them larger and cut down to size before attaching them to the text block.
- Change the font and size of the page numbers
- Think about where the thread is on the reverse of the title – connecting threads can cause lumps and bumps once the mulberry paper is bonded to the fabric
- I need to adjust the margin settings – I allowed for an inside margin of 1.5cm plus a 0.5cm gutter and an outside margin of 1.5cm. Once the book was put together the inside margin turned out to be quite generous whereas the outside margin turned out to be problematical after my attempts at trimming. I think next time I will reduce the inside by 0.5cm and increase the outer by 0.5cm.
What I find intriguing is that the act of researching and making this book to document my becoming, is itself part of the process of becoming.
Onwards and upwards!
